MySQL to ClickHouse Example
Here we use an example to introduce how to use Apache InLong creating MySQL -> ClickHouse data synchronization.
Deployment
Install InLong
Before we begin, we need to install InLong. Here we provide two ways:
- Docker Deployment (Recommended)
- Bare Metal Deployment
Add Connectors
Download the connectors corresponding to Flink version, and after decompression, place sort-connector-jdbc-[version]-SNAPSHOT.jar in /inlong-sort/connectors/ directory.
Install ClickHouse
docker run -d --rm --net=host --name clickhouse -e CLICKHOUSE_USER=admin -e CLICKHOUSE_PASSWORD=inlong -e CLICKHOUSE_DEFAULT_ACCESS_MANAGEMENT=1 clickhouse/clickhouse-server:22.8
Cluster Initialize
When all containers are successfully started, you can access the InLong dashboard address http://localhost, and use the following default account to log in.
User: admin
Password: inlong
Create Cluster Tag
Click [Clusters] -> [ClusterTags] -> [Create] on the page to specify the cluster label name and person in charge.
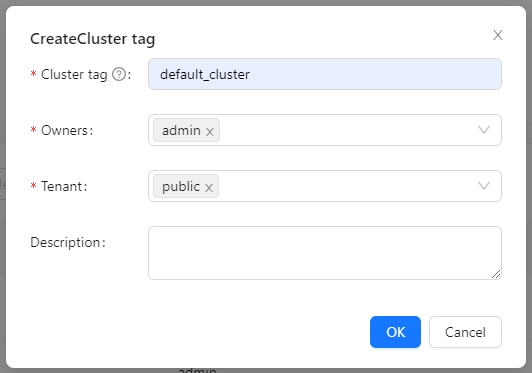
default_cluster is the default ClusterTags reported by each component. If you decide to use a different name, make sure to update the corresponding tag configuration accordingly.
Register Pulsar Cluster
Click [Clusters] -> [Cluster] -> [Create] on the page to register Pulsar Cluster.
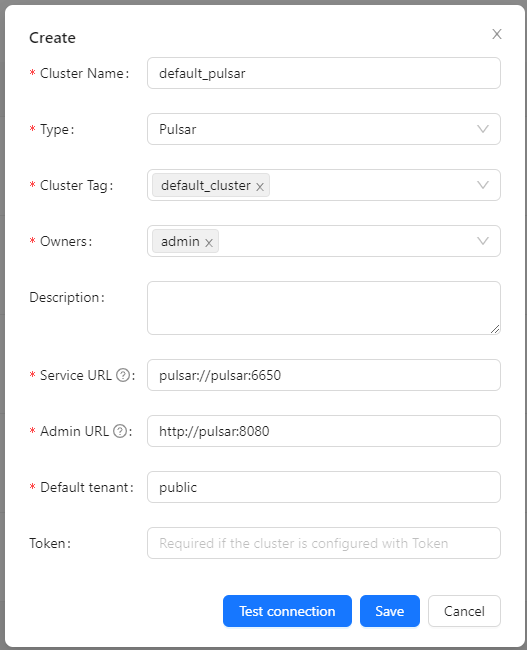
The ClusterTags selects the newly created default_cluster, the Pulsar cluster deployed by docker:
Service URL is pulsar://pulsar:6650, Admin URL is http://pulsar:8080.
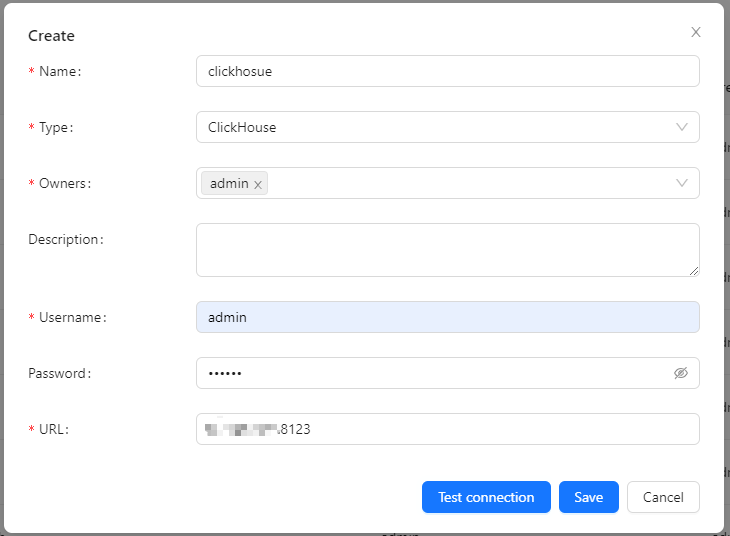
Register ClickHouse DataNodes
Click [DataNodes] -> [Create] on the page to register ClickHouse DataNodes.
Create Task
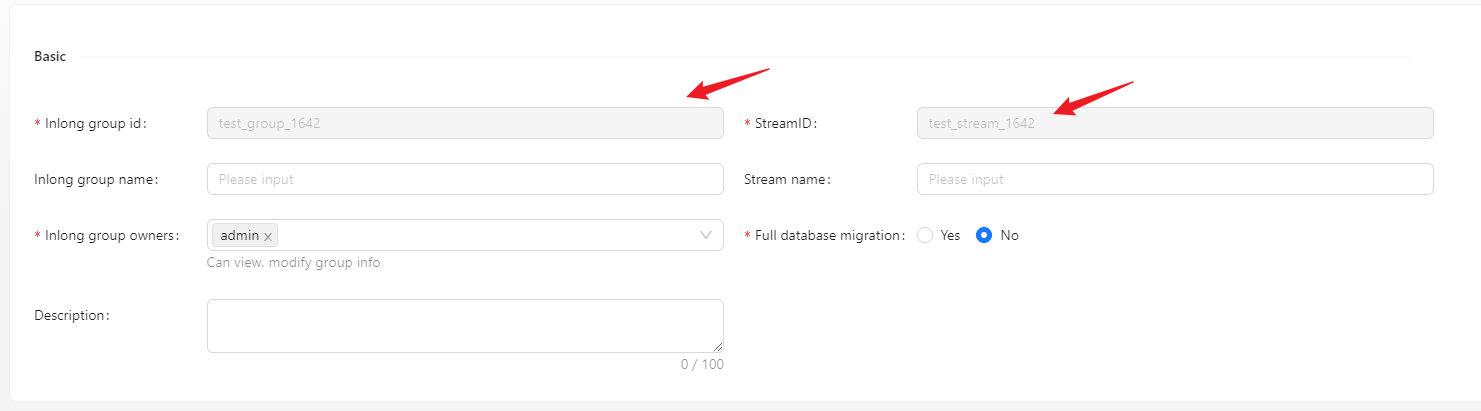
Create Data Streams Group
Click [Synchronization] → [Create] on the page and input the Group ID and Steam ID:
Create Data Source
In the data source, click [New] → [MySQL] to configure the source name, address, databases and tables information.
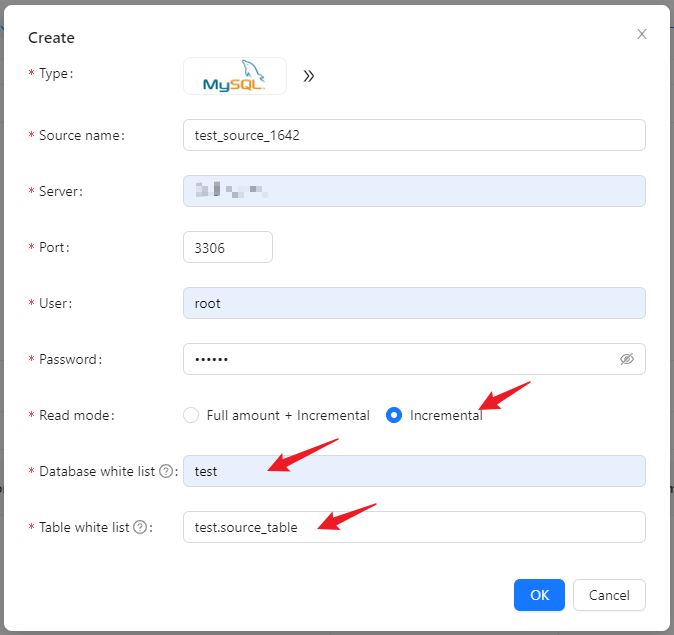
- Please create the test.source_table database table in advance, the schema is: CREATE TABLE test.source_table (id INT PRIMARY KEY, name VARCHAR(50));
Create Data Sink
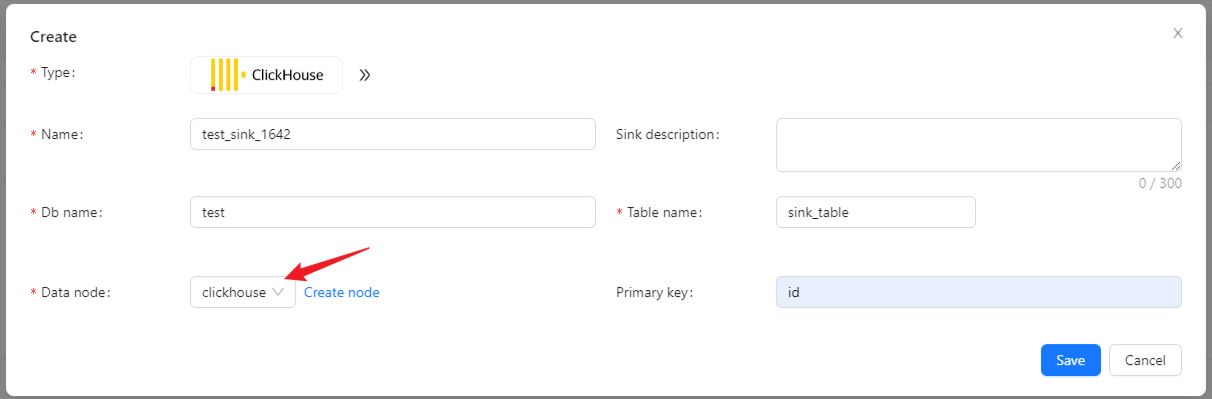
In the data target, click [New] → [ClickHouse] to configure the name, DB name, table name, and created ck data node.
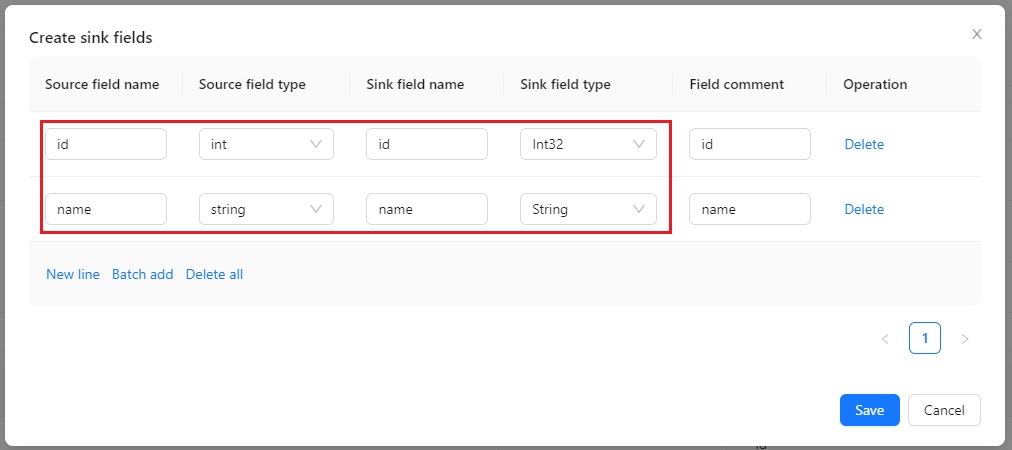
Configuration Fields
Configure fields mapping in [Source Field] and [Target Field] respectively, and click [Submit] after completion.
Approve Data Stream
Click [Approval] -> [MyApproval] -> [Approval] -> [Ok].

Back to [Synchronization] page, wait for [success].
Test Data
Send Data
#!/bin/bash

# MySQL info
DB_HOST="mysql"
DB_USER="root"
DB_PASS="inlong"
DB_NAME="test"
DB_TABLE="source_table"

# Insert data in a loop
for ((i=1; i<=1000; i++))
do
# Generate data
id=$i
name="name_$i"

    # Build an insert SQL
    query="INSERT INTO $DB_TABLE (id, name) VALUES ($id, '$name');"

    # Execute insert SQL
    mysql -h $DB_HOST -u $DB_USER -p$DB_PASS $DB_NAME -e "$query"
done
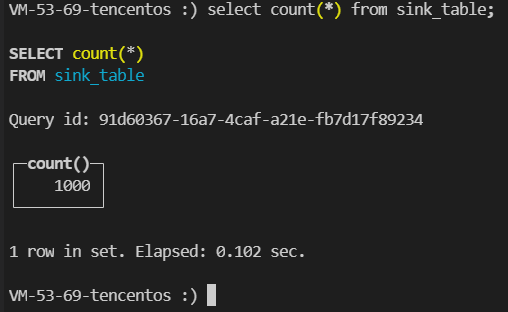
Insert 1000 pieces of data in total:

Verify Data
Then enter the ClickHouse container and view the source table data:
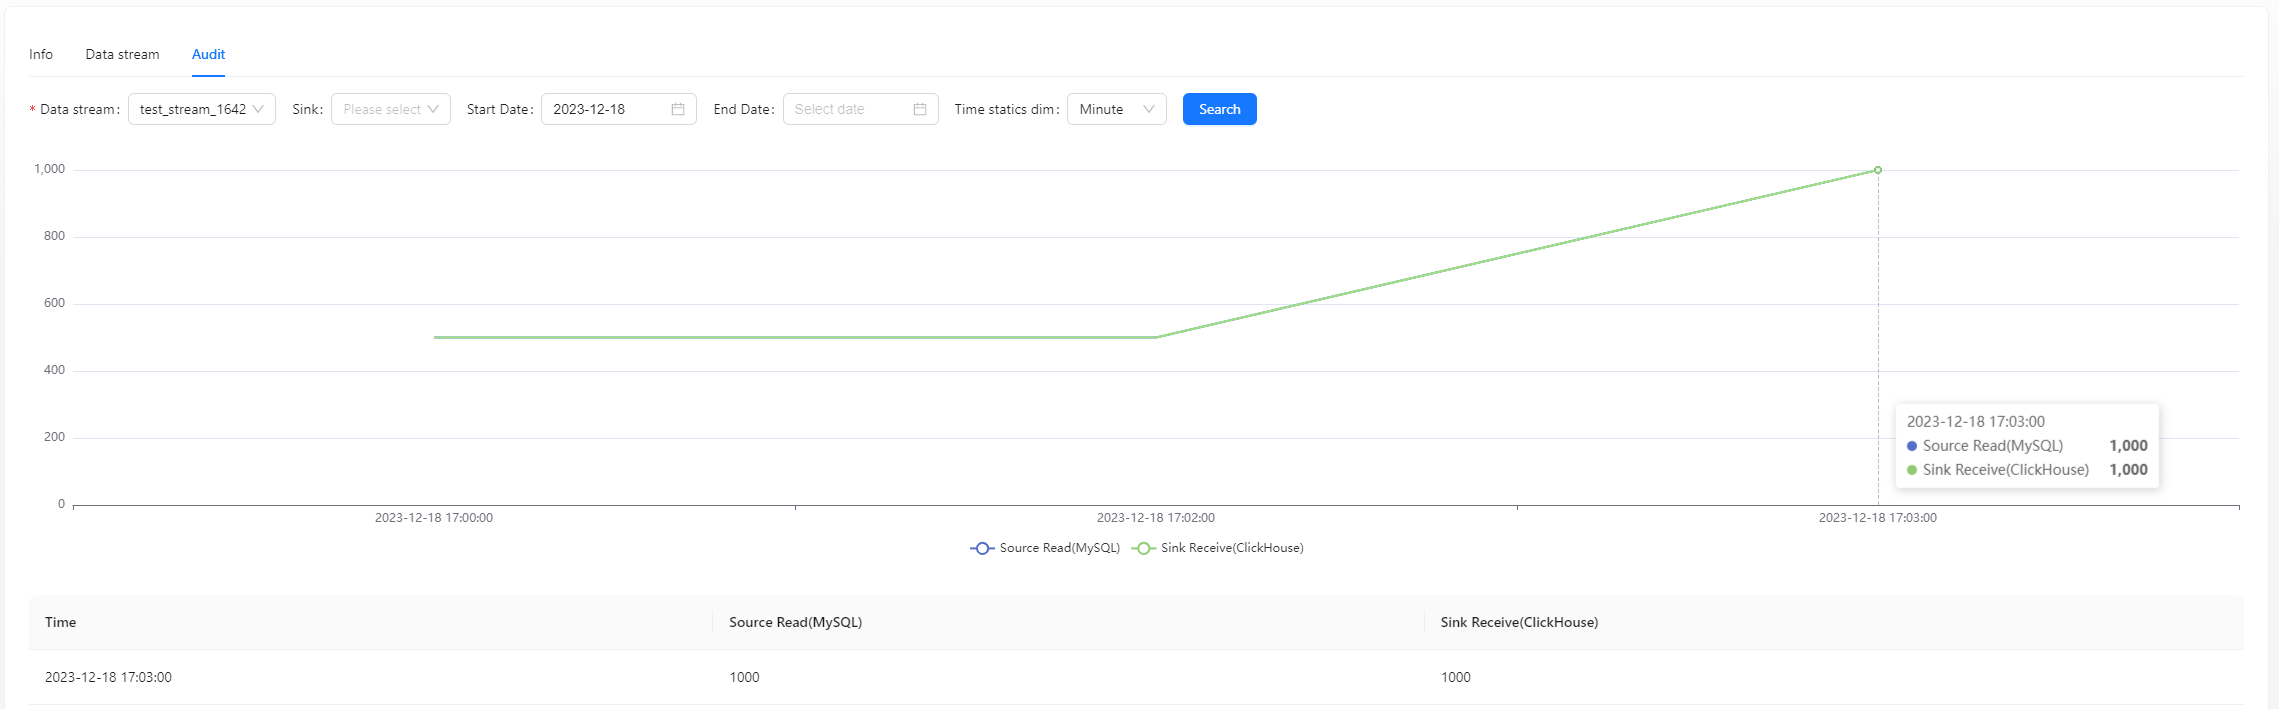
You can also view audit data on the page:
FAQ
ClickHouse fails to write data, you can view the error on the Flink page and check the permissions of the user and table engine used.