Deployment
Environment Requirements
Install and start MySQL 5.7+
initialize database there is
sql/apache_inlong_manager.sqlininlong-managerdirectory, load this file through the following command to complete the initialization of the table structure and basic data# initialize database:
mysql -uDB_USER -pDB_PASSWD < sql/apache_inlong_manager.sql
Add Dependencies
- Download Sort Connector Binary file, and unzip it into
inlong-sort/connectorsdirectory. - If using MySQL database, please download mysql-connector-java-8.0.27.jar and put it in the
lib/directory. - If you use PostgreSQL database, you don't need to download additional dependencies.
Update Configuration
Go to the decompressed inlong-manager directory and modify the conf/application.properties file:
# manager service port number
server.port=8083

# The configuration file used is dev
spring.profiles.active=dev
The dev configuration is specified above, then modify the conf/application-dev.properties file:
If test or prod is specified, modify the corresponding application-xxx.properties file.
spring.datasource.druid.url=jdbc:mysql://127.0.0.1:3306/apache_inlong_manager?useSSL=false&allowPublicKeyRetrieval=true&characterEncoding=UTF-8&nullCatalogMeansCurrent=true&serverTimezone=GMT%2b8
spring.datasource.druid.username=root
spring.datasource.druid.password=inlong
Configure the Flink Plugin
The InLong Manager can start the Sort task, you need to configure the Flink environment first. The configuration file is plugins/flink-sort-plugin.properties.
# Flink host split by coma if more than one host, such as 'host1,host2'
flink.rest.address=127.0.0.1
# Flink port
flink.rest.port=8081
# Flink job manager port
flink.jobmanager.port=6123
# InLong Audit Proxy Address
metrics.audit.proxy.hosts=127.0.0.1:10081
Start Application
bash +x bin/startup.sh
Cluster Initialize
When all containers are successfully started, you can access the Inlong dashboard address http://localhost, and use the following default account to log in:
User: admin
Password: inlong
Create Cluster Tag
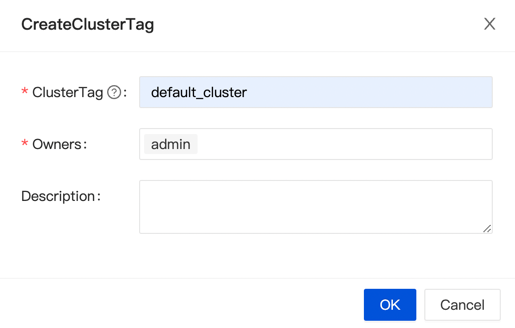
Click [Clusters]->[ClusterTags]->[Create] on the page to specify the cluster label name and person in charge:

Since each component reports the ClusterTags as default_cluster by default, do not use other names.
Register MQ Cluster
You could only Register the MQ type you chose.
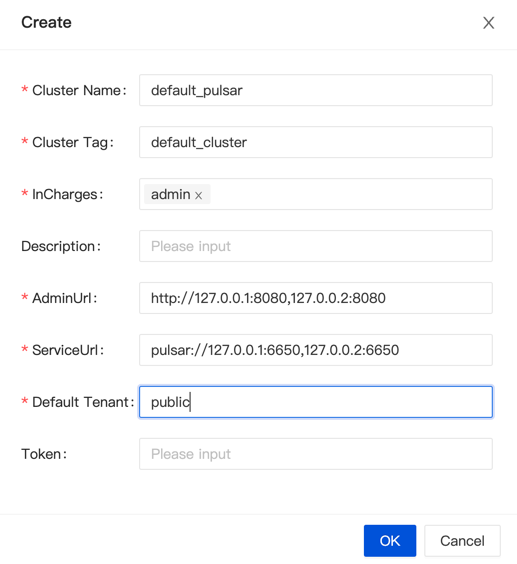
Option 1: Register Pulsar Cluster Click [Clusters]->[Clusters]->[Create] on the page to register Pulsar Cluster:

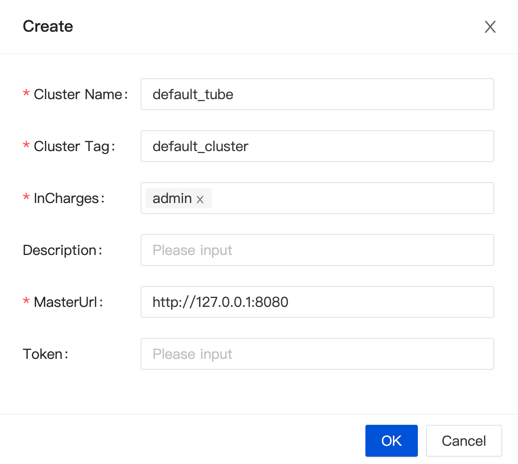
Option 2: Register TubeMQ Cluster Click [Clusters]->[Clusters]->[Create] on the page to register TubeMQ Cluster:

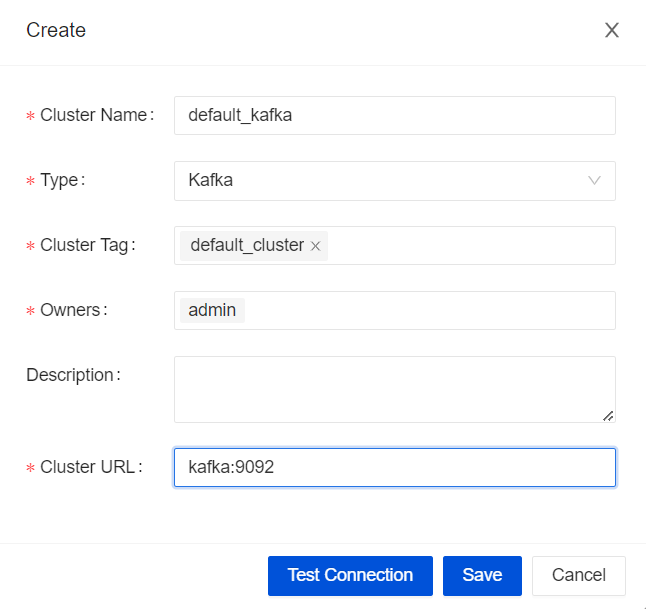
Option 3: Register Kafka Cluster Click [Clusters]->[Clusters]->[Create] on the page to register TubeMQ Cluster:

The ClusterTags selects the newly created default_cluster, and then configuring the MQ cluster info.
(Optional) Enable OpenAPI Authentication
Enable Authentication
Manager supports the option to authenticate client component access to its open APIs. To enable authentication modify conf/application.properties:
# Manager open api authentication enabled
openapi.auth.enabled=true
Authentication Configuration
Components that access manager must be authenticated by secret id and secret key if enabled, for example (please configure user's own instead of the example) :
Modify agent.properties in agent's conf directory:
agent.manager.auth.secretId=admin
agent.manager.auth.secretKey=87haw3VYTPqK5fK0
Modify common.properties in dataproxy's conf directory:
manager.auth.secretId=admin
manager.auth.secretKey=87haw3VYTPqK5fK0
Authentication Key Generation
Admin user can log in inlong dashboard to allocate secret ids and keys: System->User->Create.