MySQL to Iceberg Example
Here we use an example to introduce how to use Apache InLong creating MySQL -> Iceberg full database migration.
Deployment
Install InLong
Before we begin, we need to install InLong. Here we provide two ways:
- Docker Deployment (Recommended)
- Bare Metal Deployment
Add Connectors
Download the connectors corresponding to Flink version, and after decompression, place sort-connector-iceberg-[version]-SNAPSHOT.jar in /inlong-sort/connectors/ directory.
Install Iceberg
Please refer to the Installation Tutorial on the Apache Iceberg official website.
Cluster Initialize
When all containers are successfully started, you can access the InLong dashboard address http://localhost, and use the following default account to log in.
User: admin
Password: inlong
Create Cluster Tag
Click [Clusters] -> [ClusterTags] -> [Create] on the page to specify the cluster label name and responsible person.

default_cluster is the default ClusterTags reported by each component. If you decide to use a different name, make sure to update the corresponding tag configuration accordingly.
Register Pulsar Cluster
Click [Clusters] -> [Cluster] -> [Create] on the page to register Pulsar Cluster.
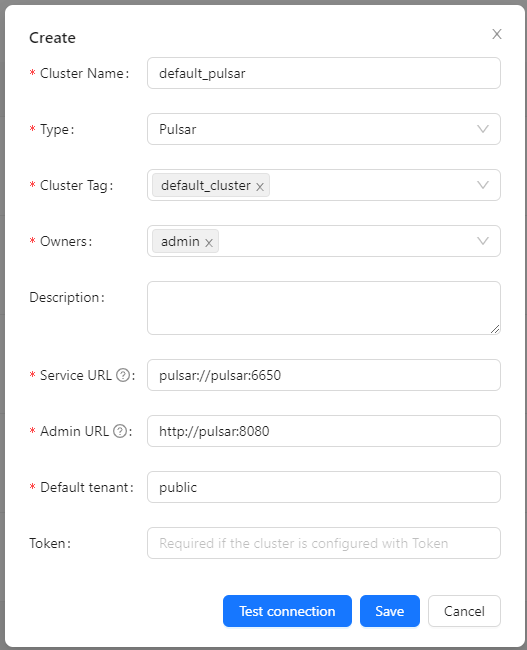
The ClusterTags selects the newly created default_cluster, the Pulsar cluster deployed by docker:
Service URL is pulsar://pulsar:6650, Admin URL is http://pulsar:8080.
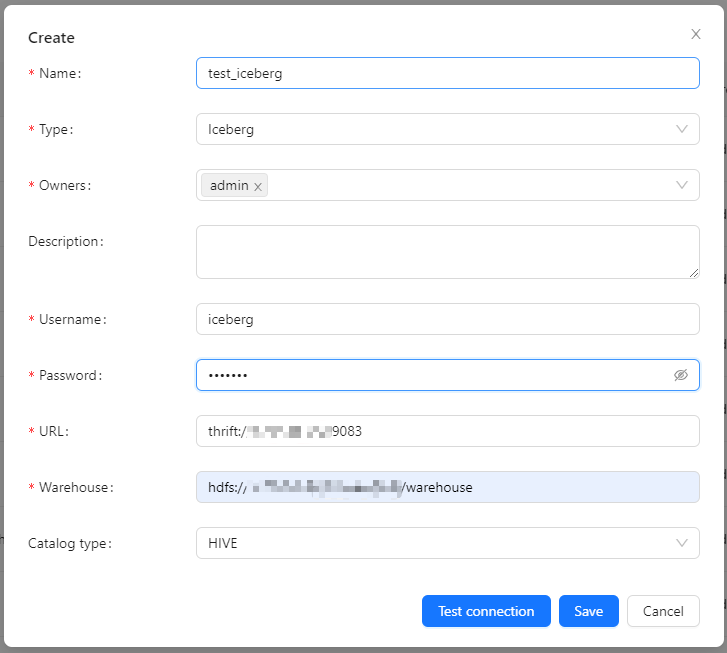
Register Iceberg DataNodes
Click [DataNodes] -> [Create] on the page to register Iceberg DataNodes.
Create Task
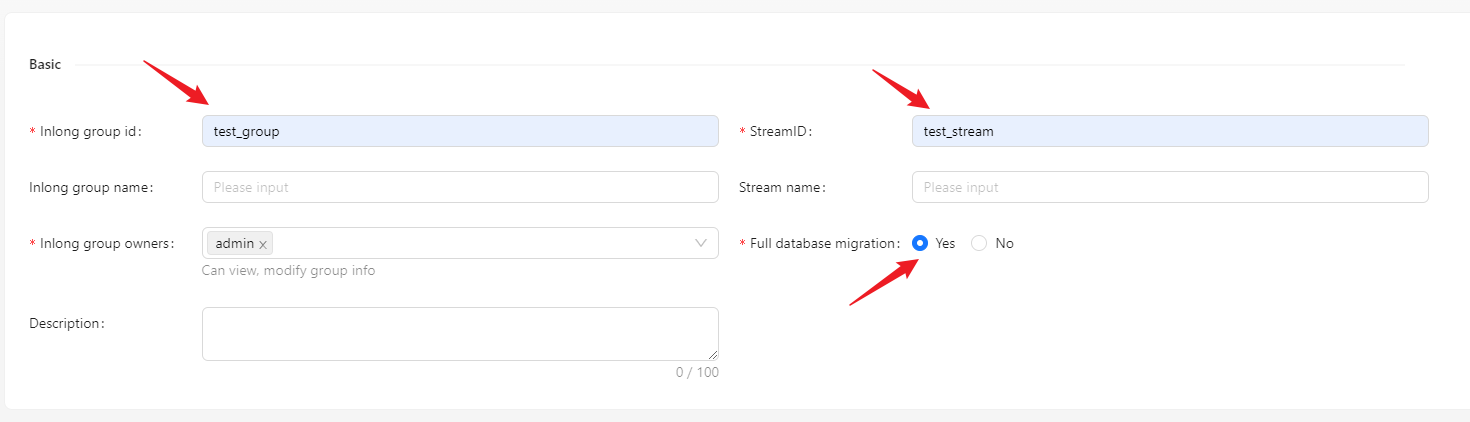
Create Data Streams Group
Click [Synchronization] → [Create] on the page and input the Group ID, Stream ID and Full database migration:
Create Data Source
In the data source, click [New] → [MySQL] to configure the source name, address, databases and tables information.
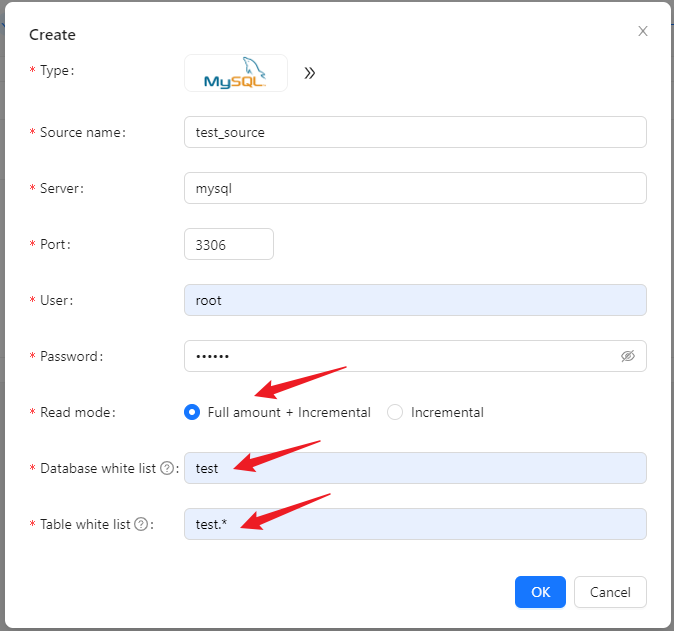
- If the read mode is
Full amount + Incremental, the existing data in the source table will also be collected, but theIncrementalmode will not. - The table white list format is
<dbName>.<tableName>and supports regular expressions.
Create Data Sink
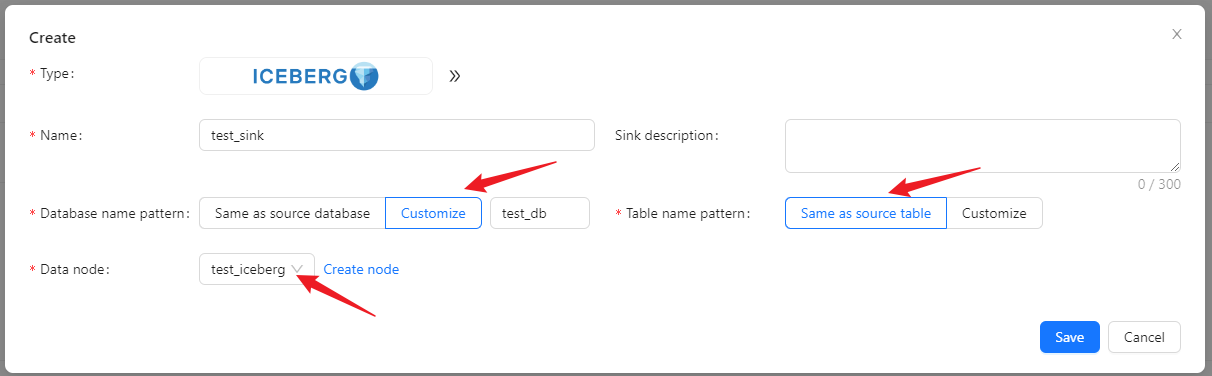
In the data sink, click [New] → [Iceberg] to configure the sink name and created Iceberg data node.
We can choose the data sink to have the same database table name as the data source, or customize it.
When customizing the names of database tables, you can use built-in parameters and string combinations to generate the target table names.
Built-in parameters include:
- Source database name: ${database}
- Source table name: ${table}
For example, if the source table name is table1 and the mapping rule is ${table}_inlong, the data from table1 will be ultimately mapped and written into table1_inlong.
Approve Data Stream
Click [Approval] -> [MyApproval] -> [Approval] -> [Ok].
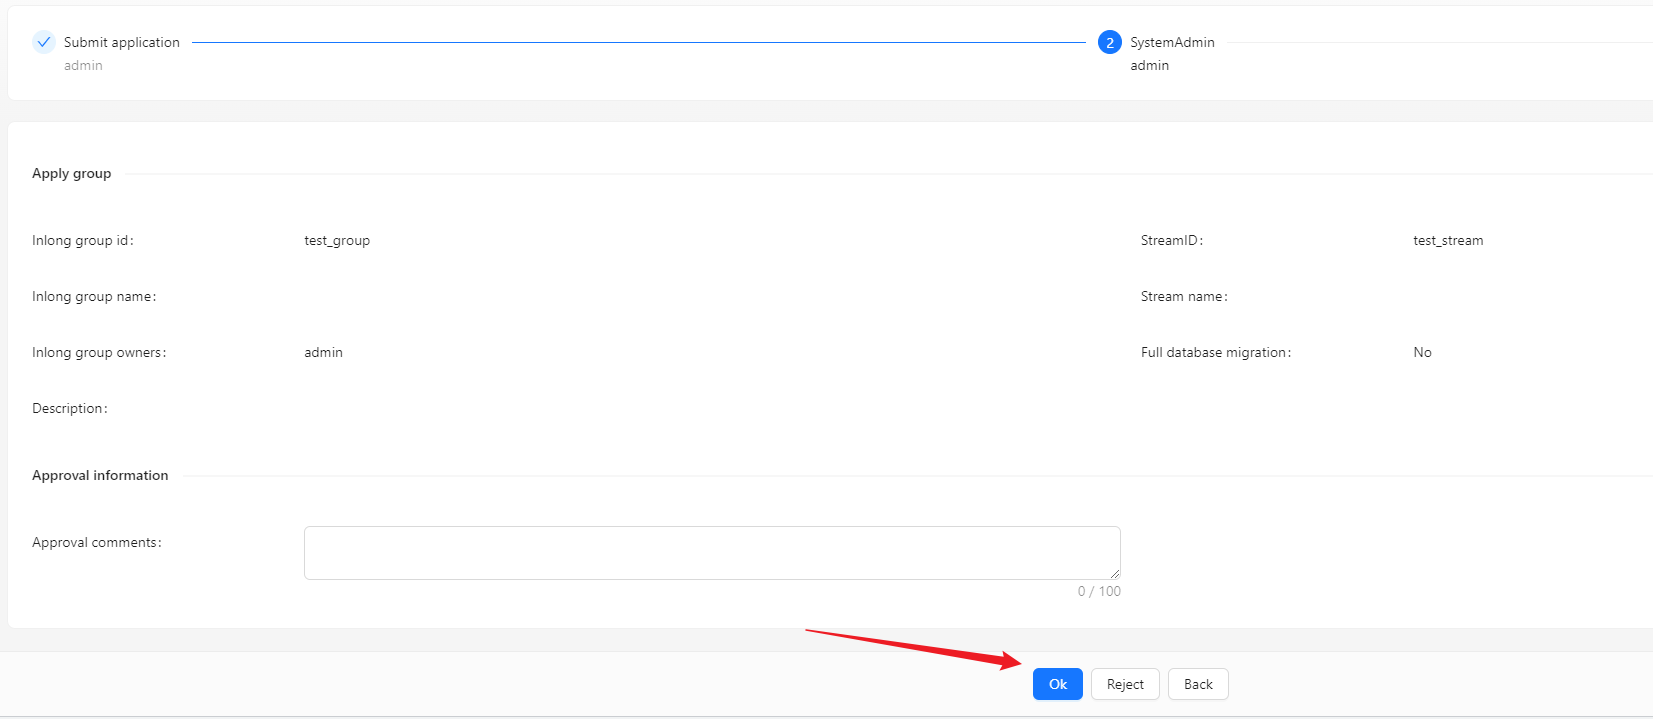
Back to [Synchronization] page, wait for [success].

Test Data
Send Data
#!/bin/bash

# MySQL info
DB_HOST="mysql"
DB_USER="root"
DB_PASS="inlong"
DB_NAME="test"
DB_TABLE1="source_table"
DB_TABLE2="source_table2"

# Insert data in a loop
for ((i=1; i<=500; i++))
do
    # Generate data
    id=$i
    name="name_$i"

    # Build an insert SQL
    query1="INSERT INTO $DB_TABLE1 (id, name) VALUES ($id, '$name');"
    query2="INSERT INTO $DB_TABLE2 (id, name) VALUES ($id, '$name');"

    # Execute insert SQL
    mysql -h $DB_HOST -u $DB_USER -p$DB_PASS $DB_NAME -e "$query1"
    mysql -h $DB_HOST -u $DB_USER -p$DB_PASS $DB_NAME -e "$query2"
done
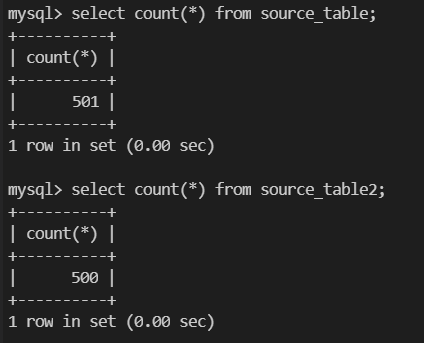
Modify the variables in the script according to the actual environment, and insert 500 pieces of data into each table(There is a piece of existing data in source_table):
Verify Data
Enter Iceberg, check data in table.

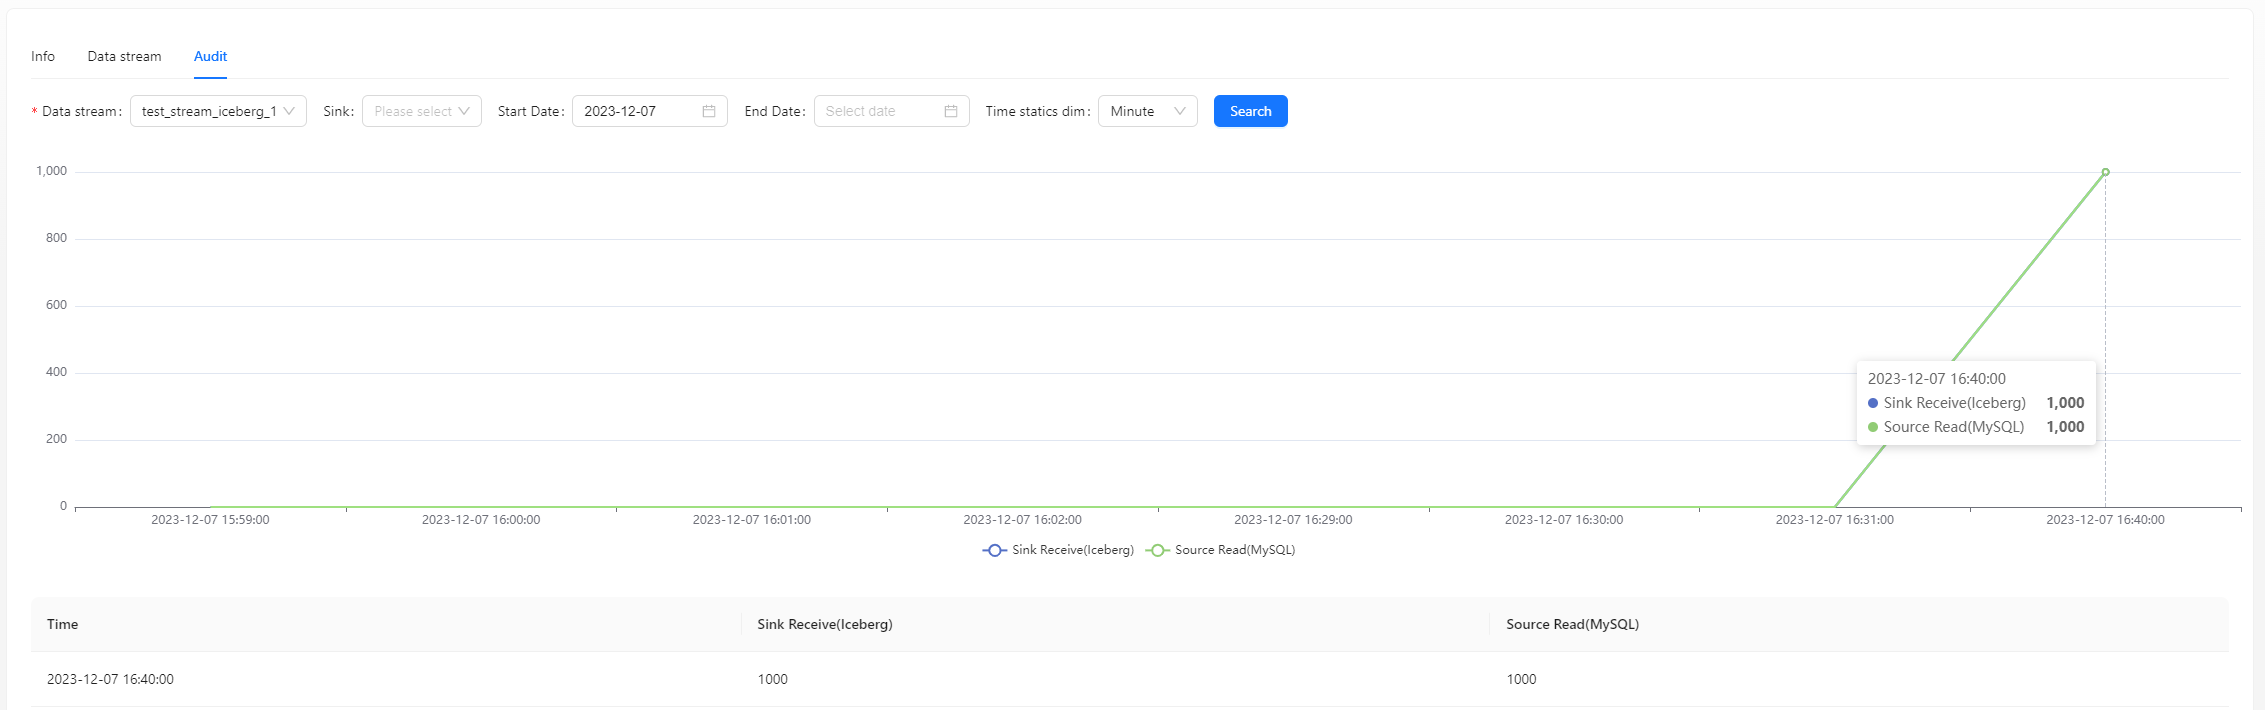
You can also view audit data on the page: