DolphinScheduler Scheduling Engine Example
In the following sections, we will walk through a complete example to demonstrate how to integrate the third-party scheduling engine DolphinScheduler into Apache InLong to create an offline data synchronization from Pulsar to MySQL.
Deployment
Install InLong
Before we begin, we need to install InLong and a usable DolphinScheduler. Here we provide two ways:
- Docker Deployment (Recommended)
- Bare Metal Deployment
Add Connectors
Download the connectors corresponding to Flink version, and after decompression, place sort-connector-jdbc-[version]-SNAPSHOT.jar in /inlong-sort/connectors/ directory.
Currently, Apache InLong's offline data synchronization capability only supports Flink-1.18, so please download the 1.18 version of connectors.
Create Clusters And Data Target
When all containers are successfully started, you can access the InLong dashboard address http://localhost, and use the following default account to log in.
User: admin
Password: inlong
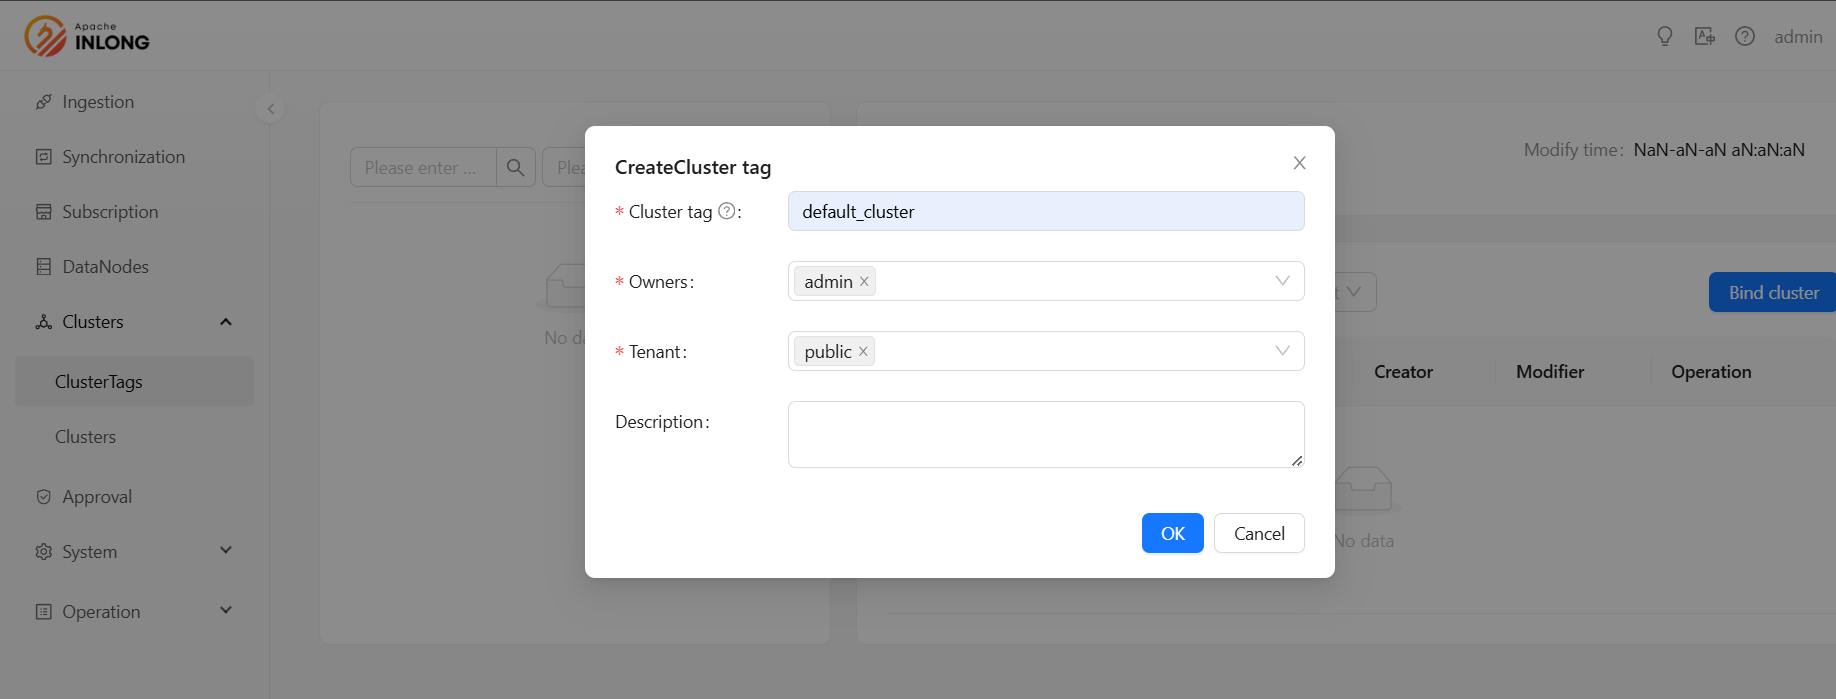
Create Cluster Tag
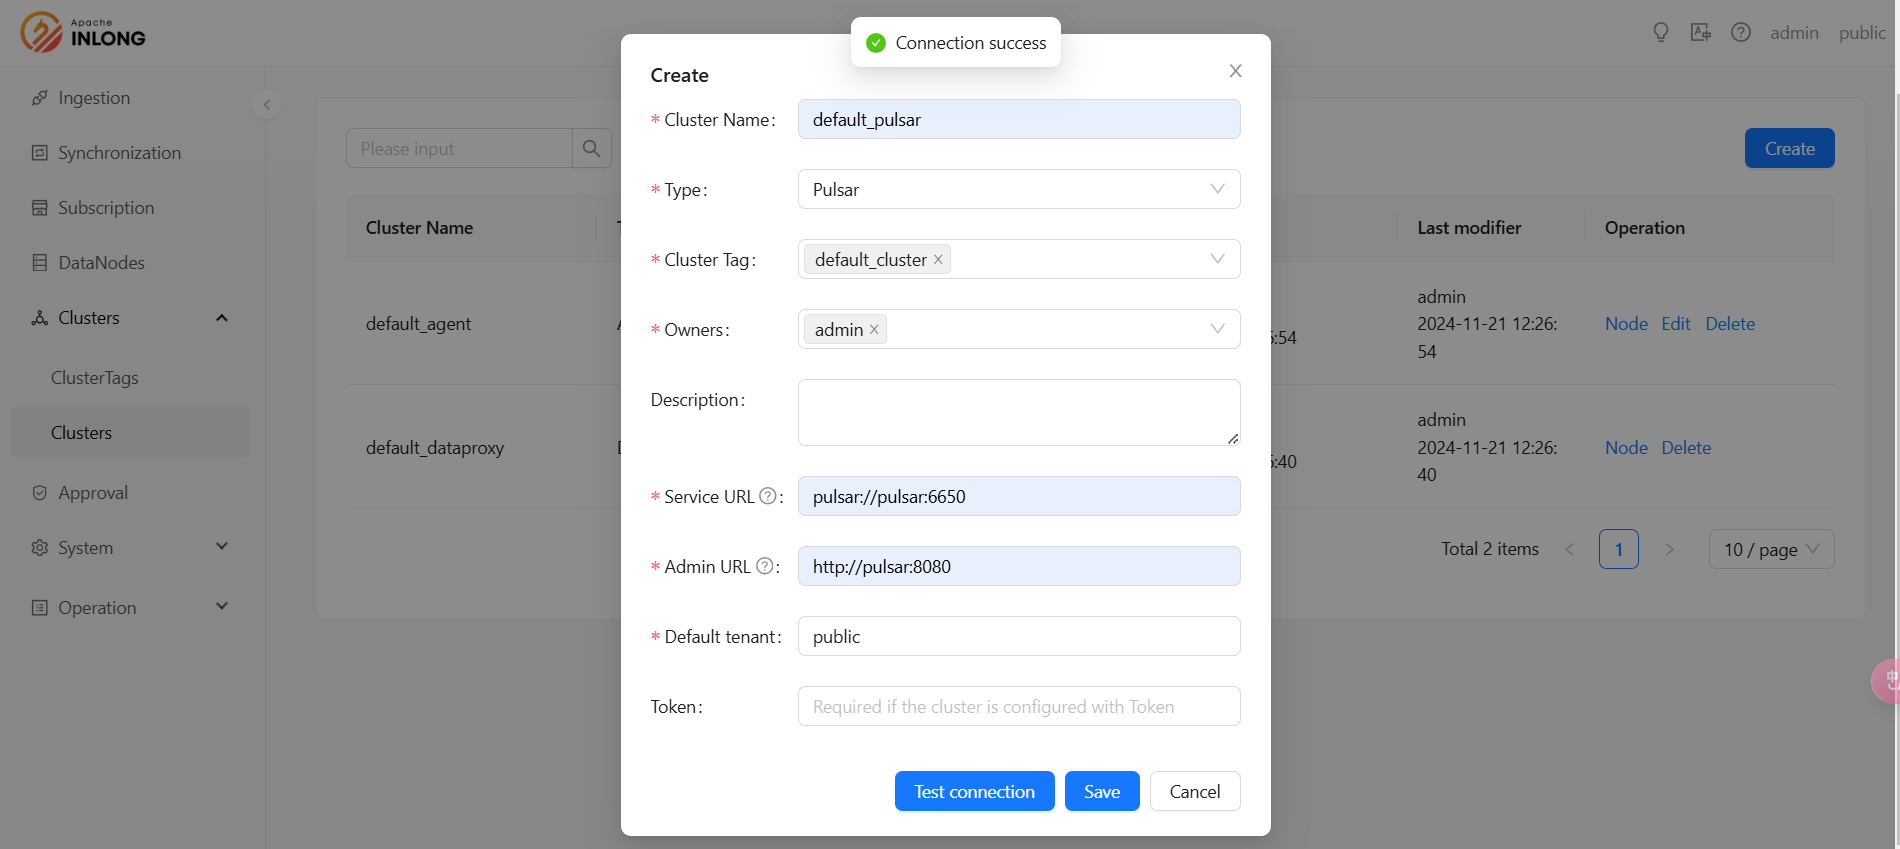
Register Pulsar Cluster
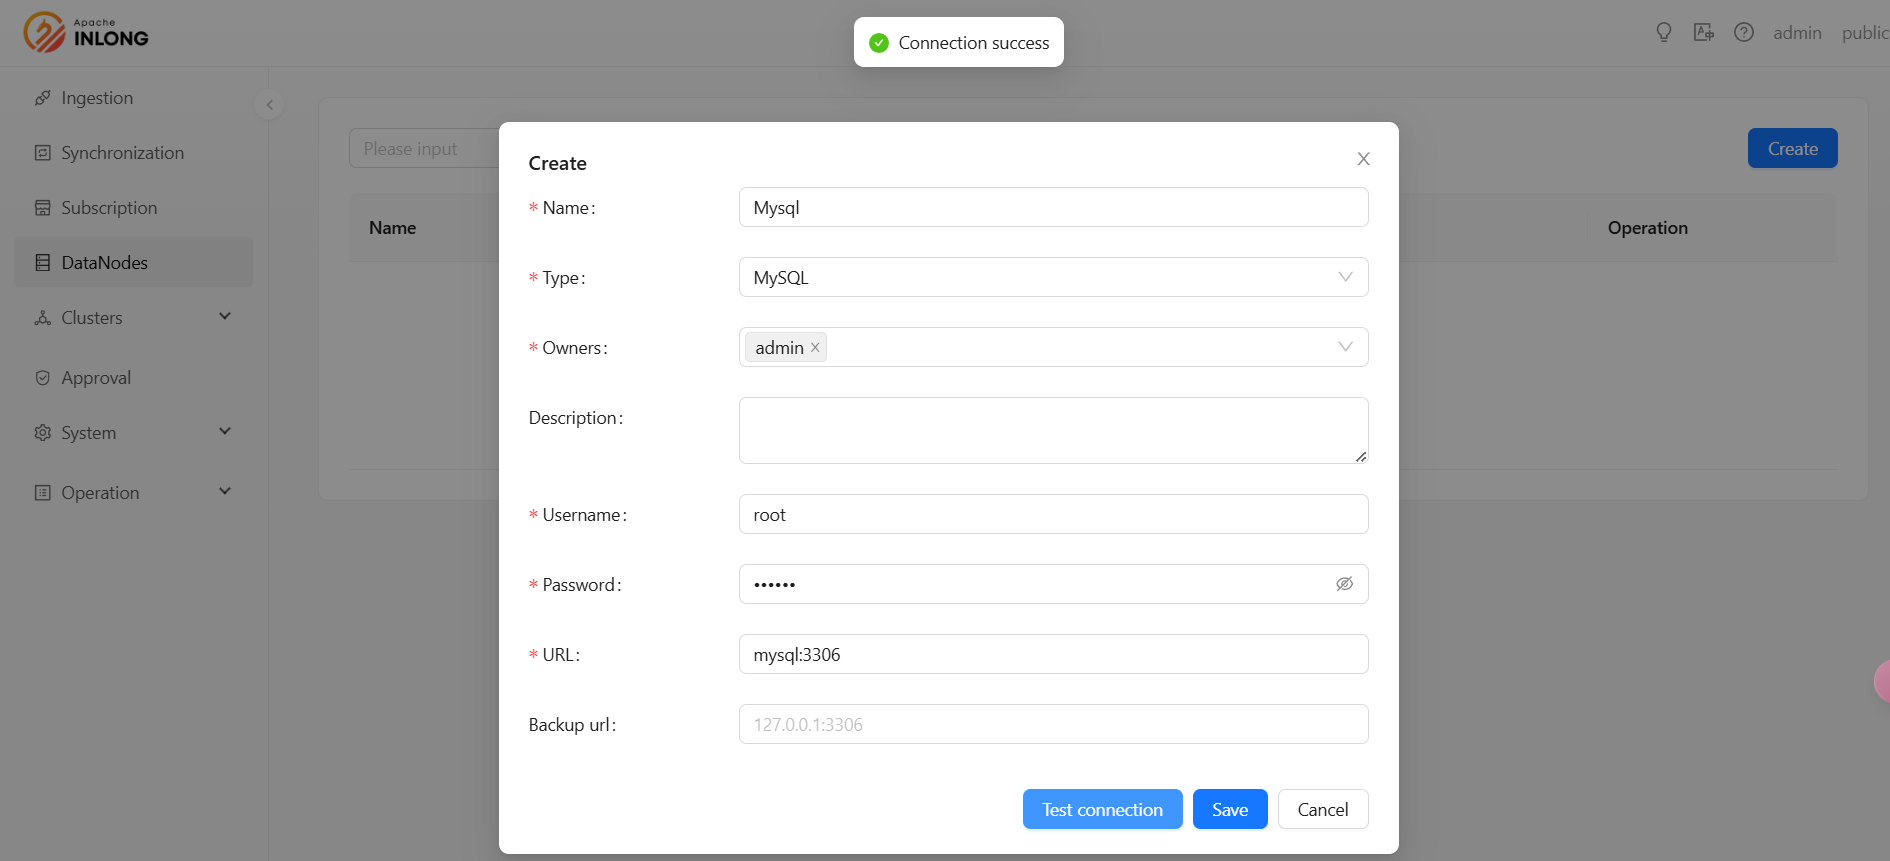
Create Data Target
Execute the following SQL statement:
CREATE TABLE sink_table (
    id INT AUTO_INCREMENT PRIMARY KEY,
    name VARCHAR(255) NOT NULL,
    create_time TIMESTAMP DEFAULT CURRENT_TIMESTAMP
);
DolphinScheduler Initialize
Deploy DolphinScheduler
Before using DolphinScheduler as your scheduling engine, please make sure you have a working DolphinScheduler on hand. If you need to deploy a DolphinScheduler for yourself, please refer to the DolphinScheduler Official Document.
Get DolphinScheduler token
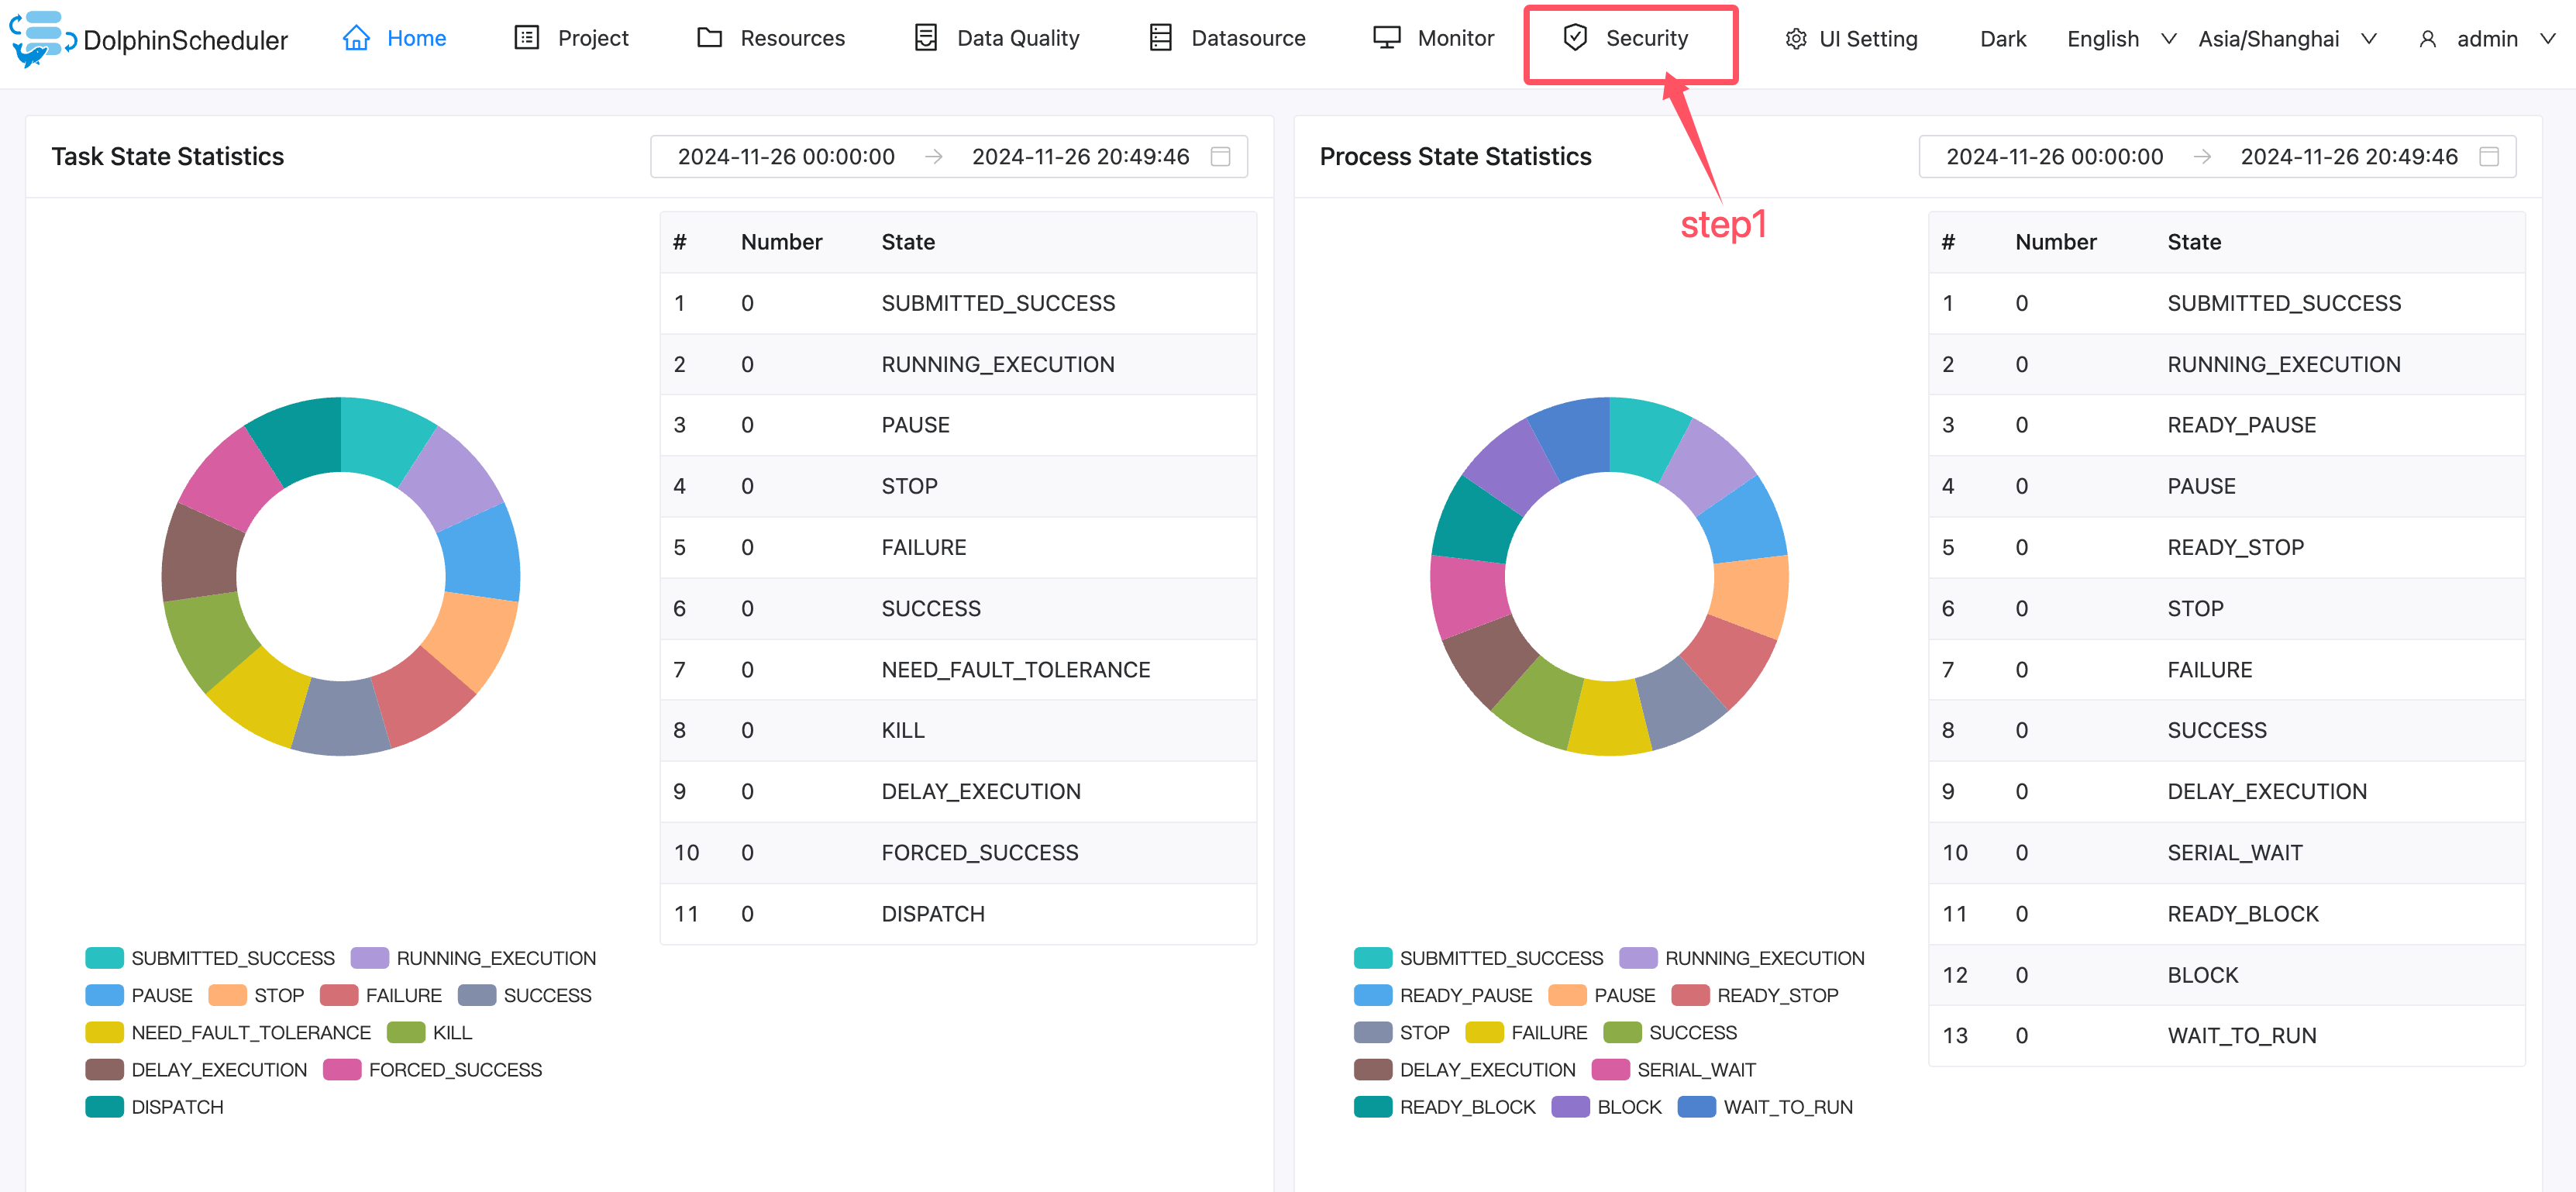
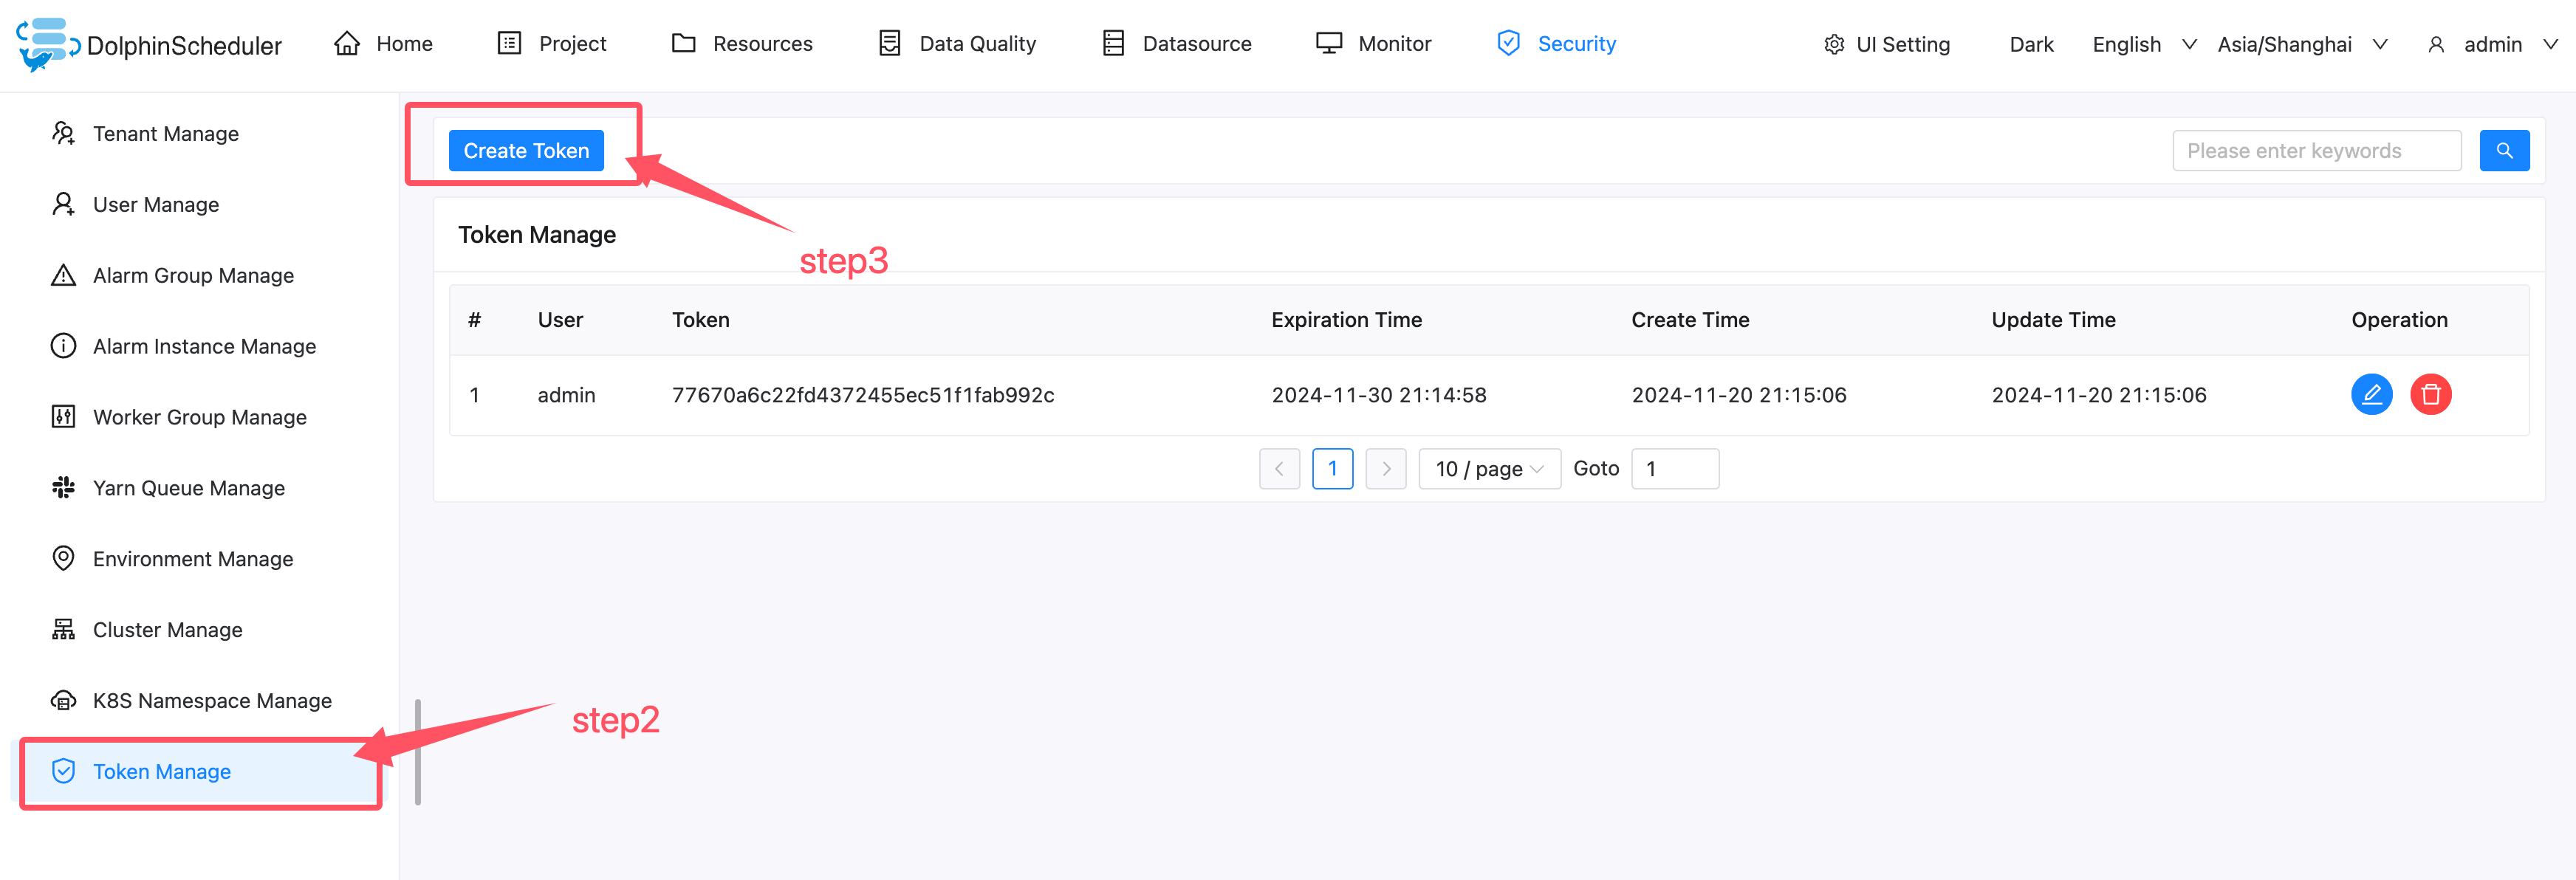
Go into Token Manager page to create a token for InLong to access.
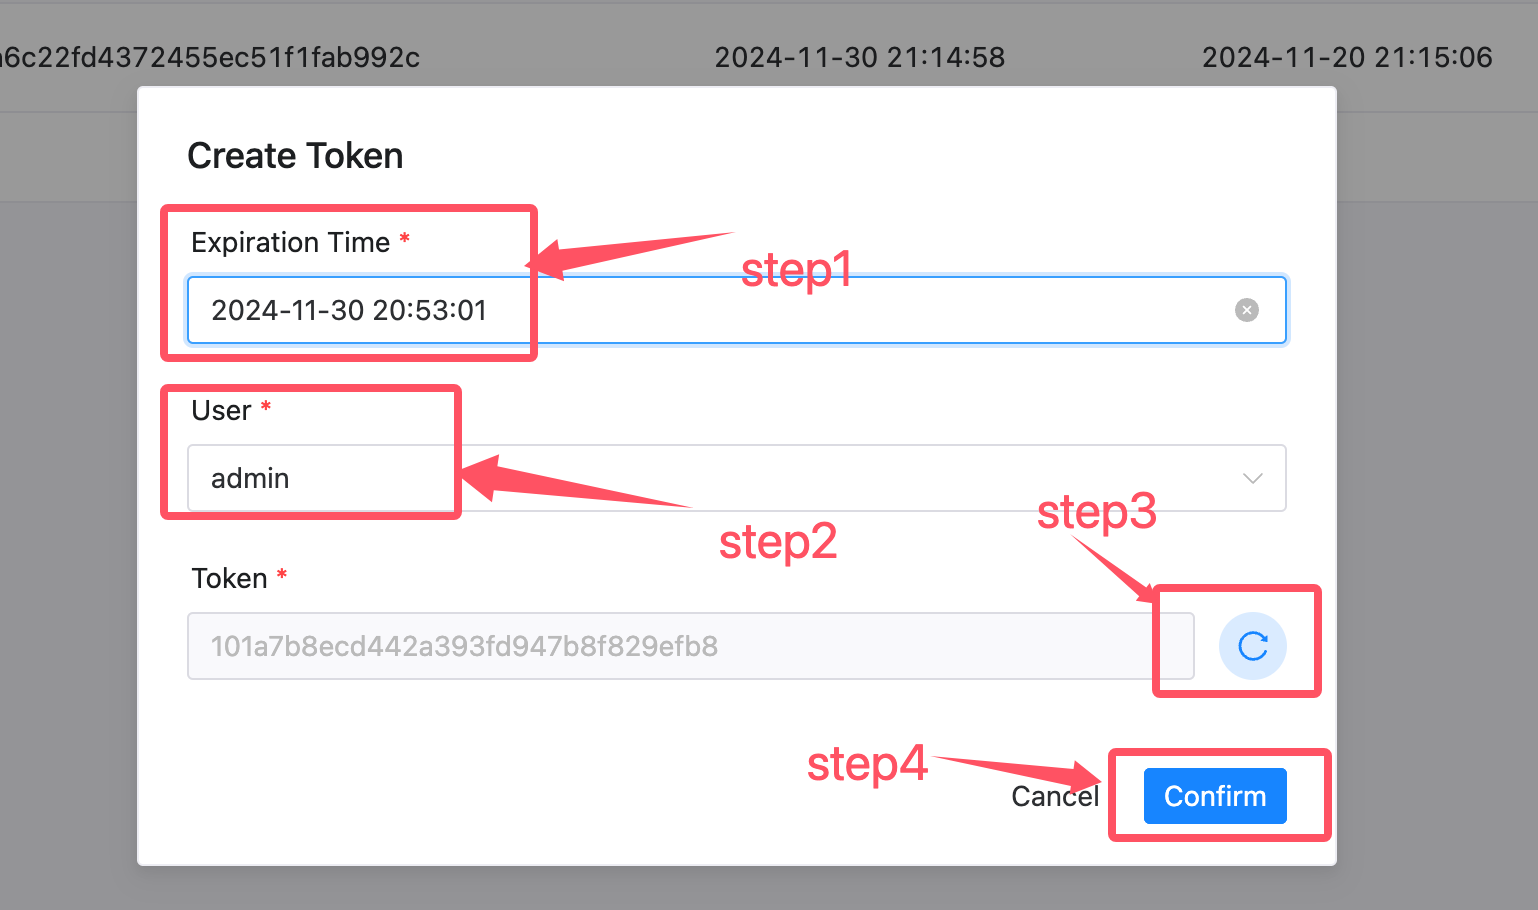
Set parameters for the token according to the steps in the figure, include [Expiration Time], [User], then generate a token.
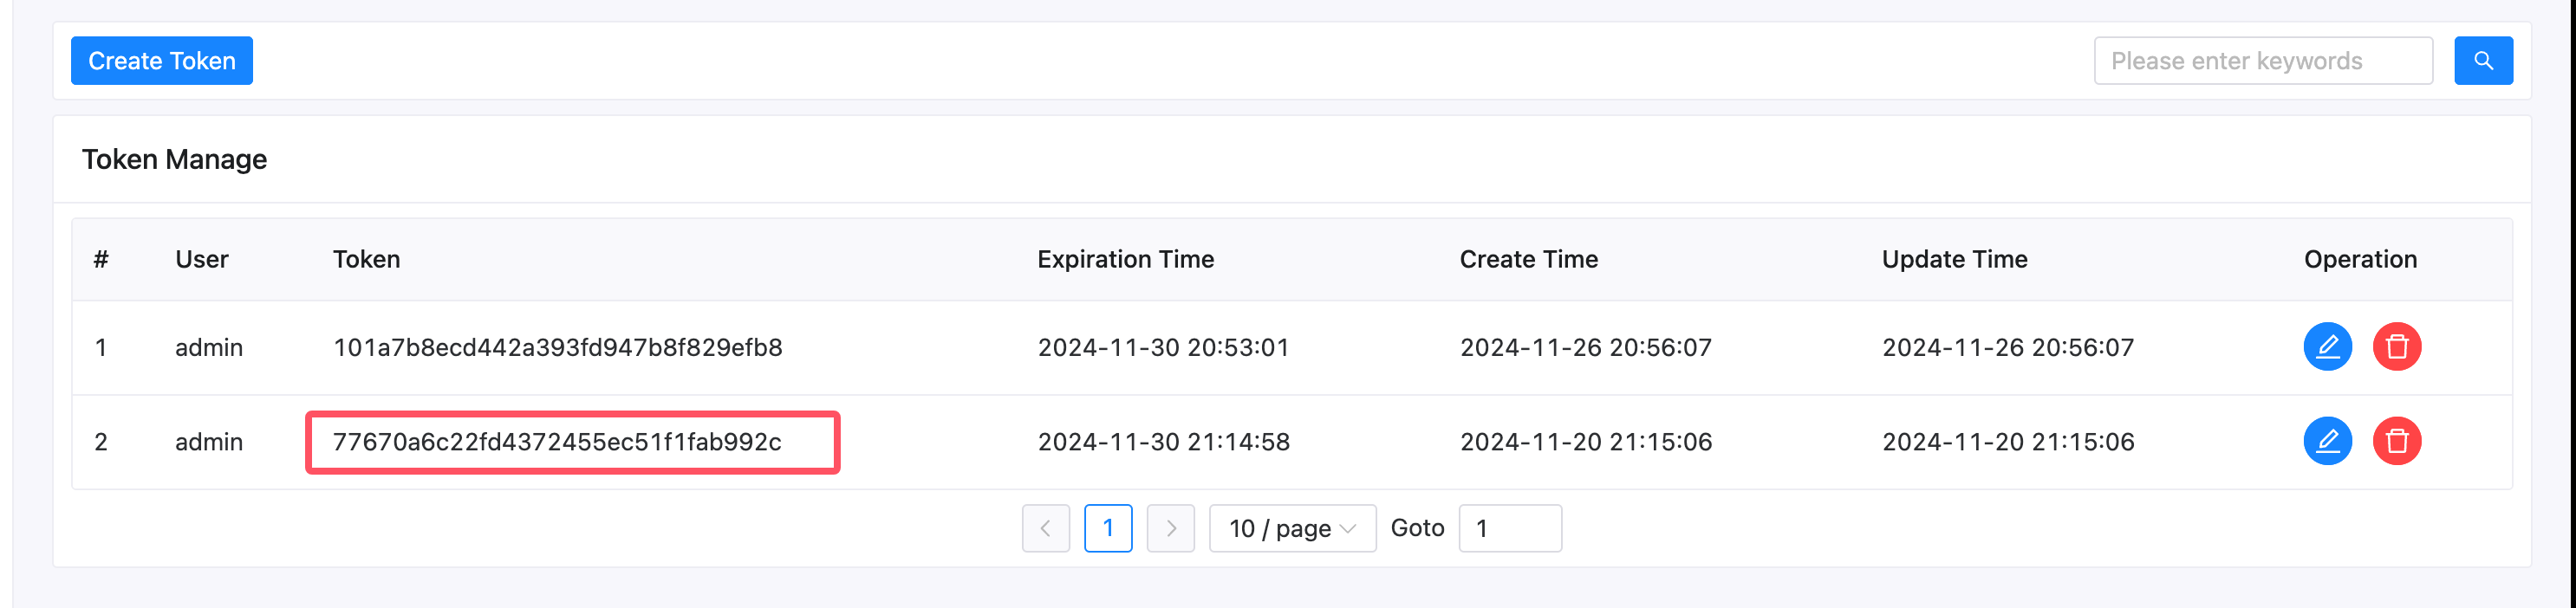
Configure InLong Manager
For third-party scheduling engine, we need to modify configurations in manager.
For DolphinScheduler engine there are following configurations need to be modified:
schedule.engine.inlong.manager.url: Third-party scheduling engine needs to access the inlong manager through this url.schedule.engine.dolphinscheduler.url: DolphinScheduler deployment url, general format is http://{ip}:{port}/dolphinschedulerschedule.engine.dolphinscheduler.token: Token you just generated in Token Manager of DolphinScheduler.

After doing this, restart the InLong Manager to ensure the configuration is enabled.
Task Creation
Create Synchronization Task
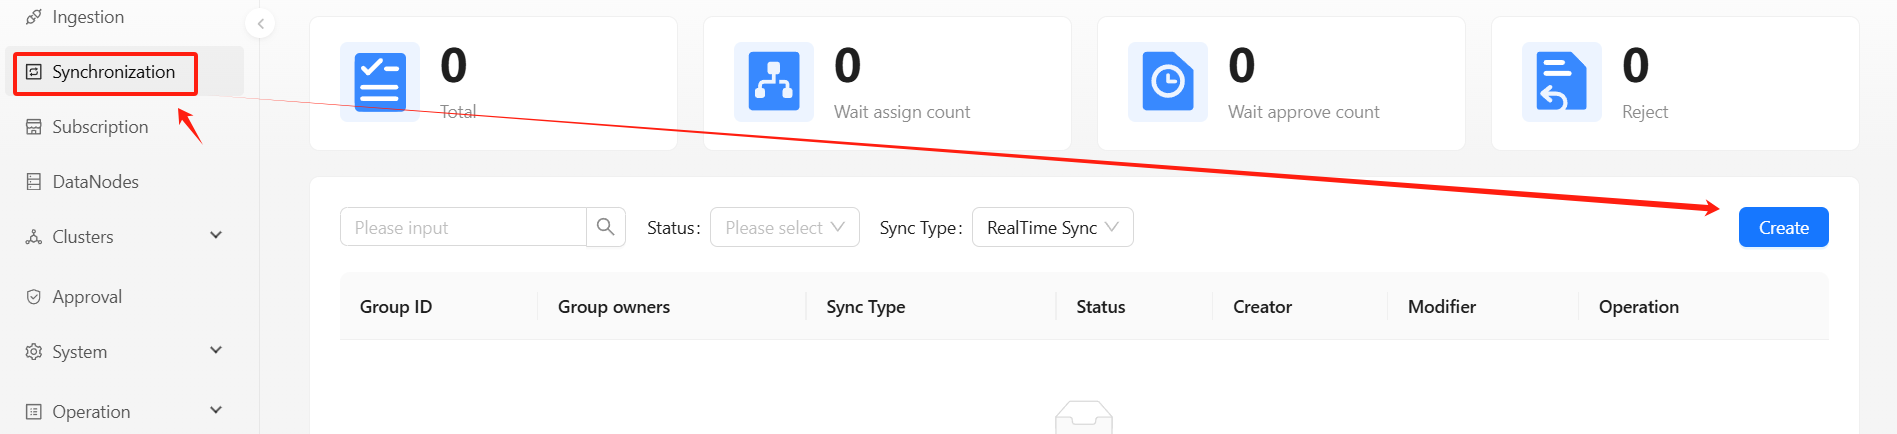
Create Data Stream Group
During configure the offline synchronization task, choose DolphinScheduler when selecting the scheduling engine, then configure other parameters.
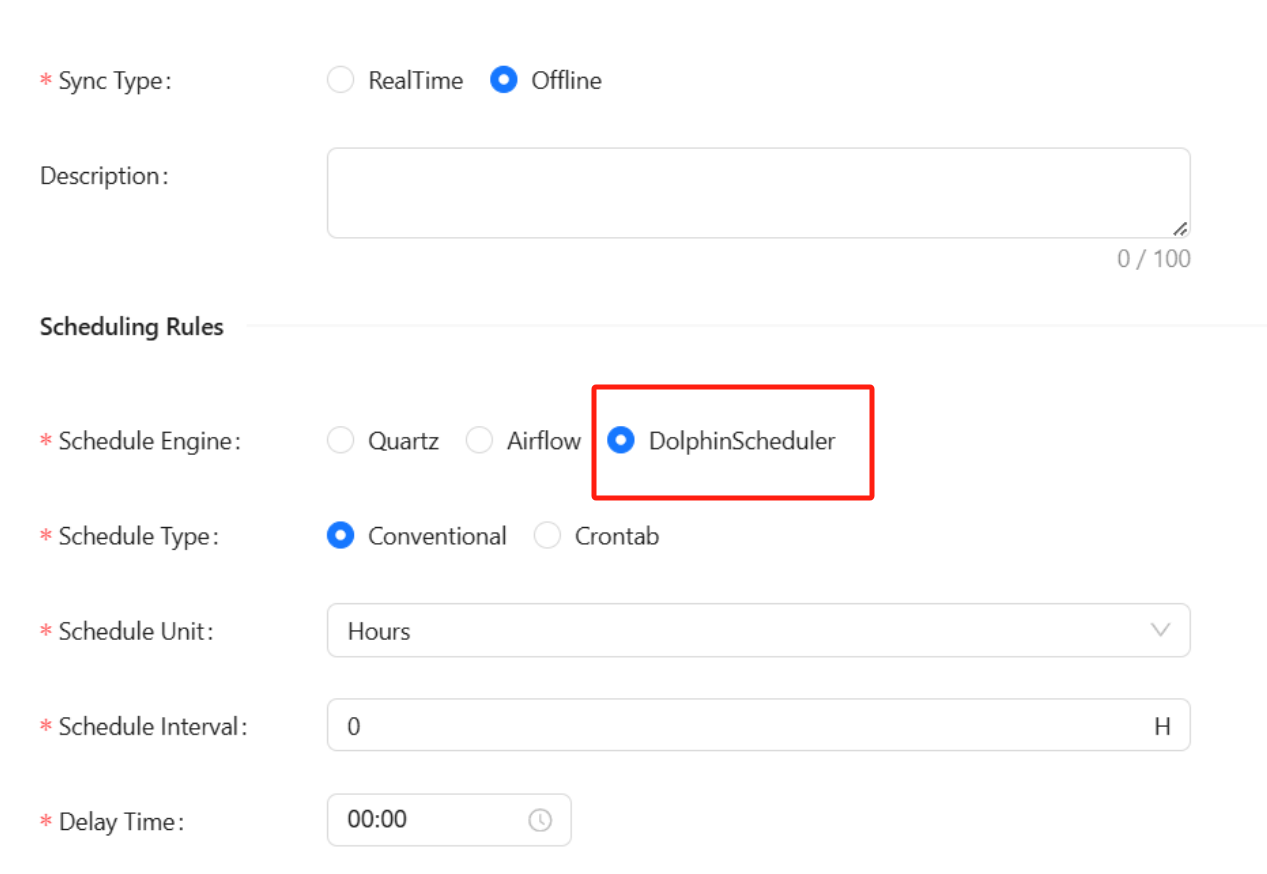
For details about how to manage clusters and configure data nodes, see Quartz Scheduling Engine Example.
Create DolphinScheduler Offline Task
After approval data flow, return to the [Synchronization] page and wait for the task configuration to succeed. Once configured successfully, the DolphinScheduler will periodically calls back InLong to synchronize offline data and the Manager will periodically submit Flink Batch Jobs to the Flink cluster.
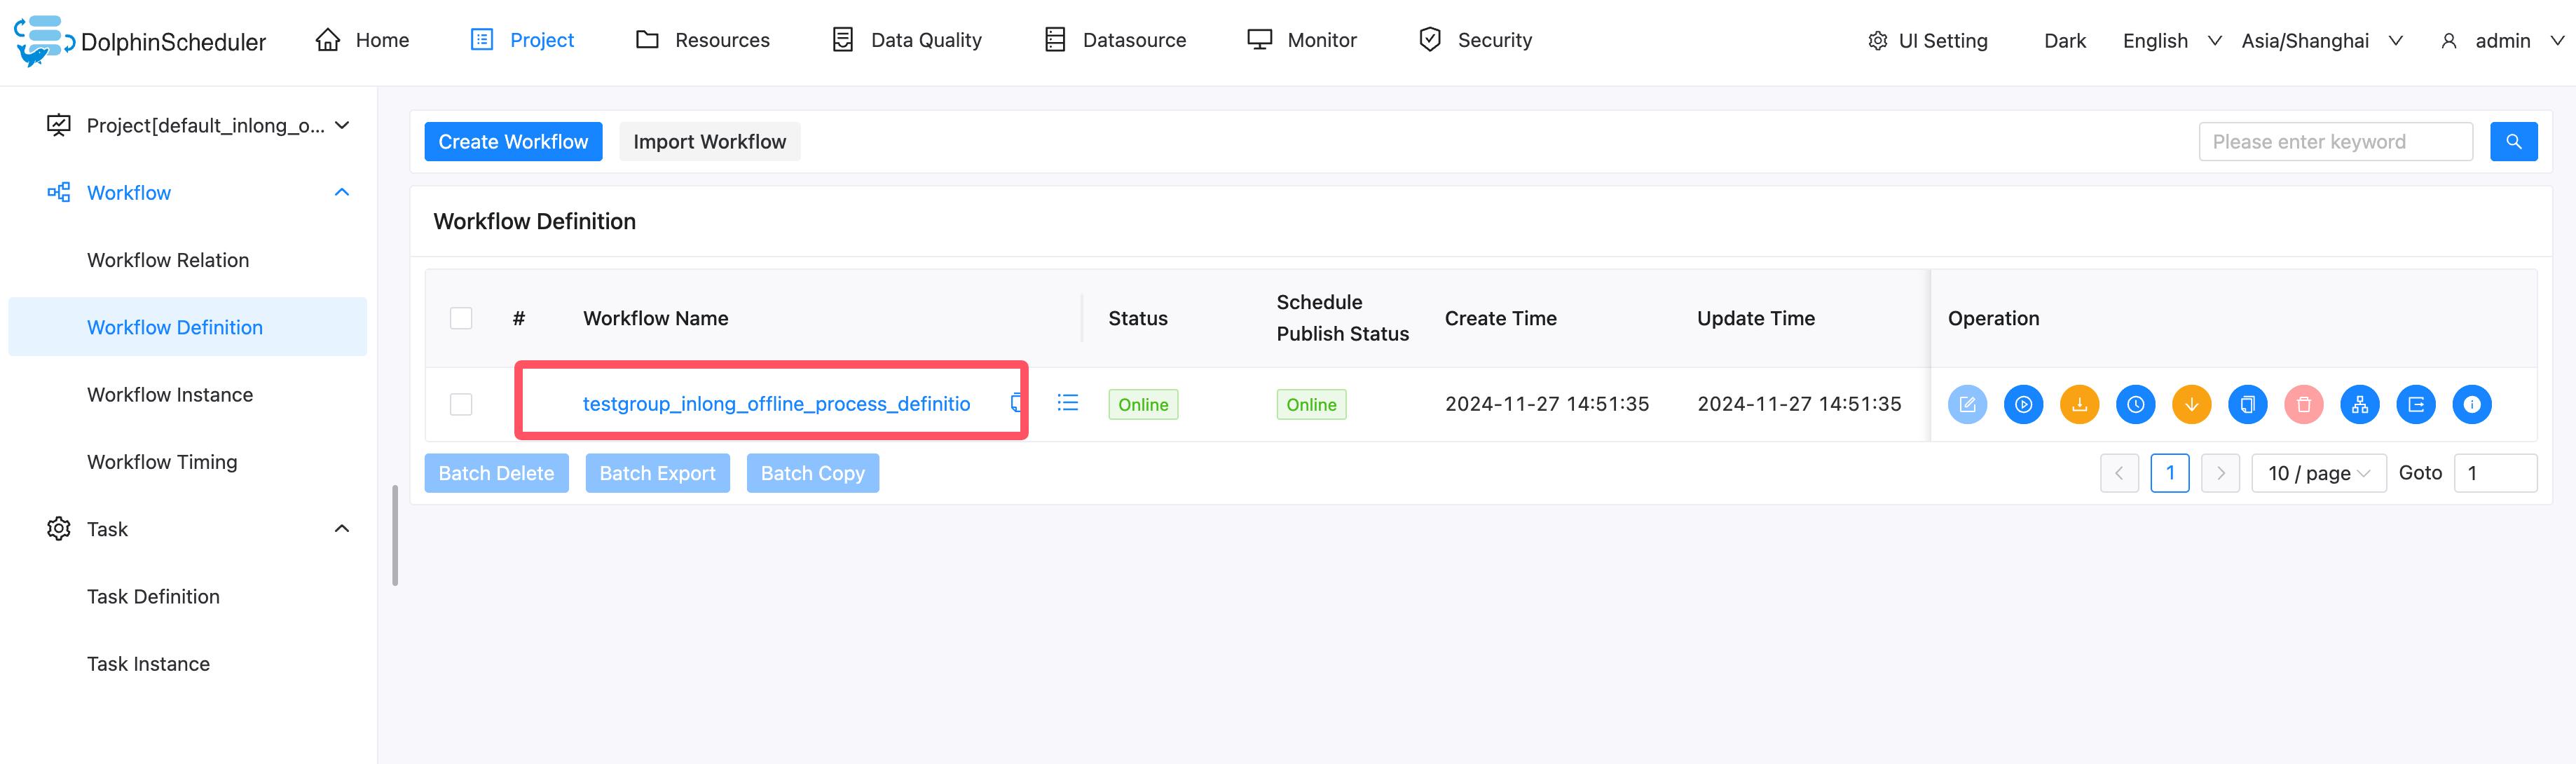
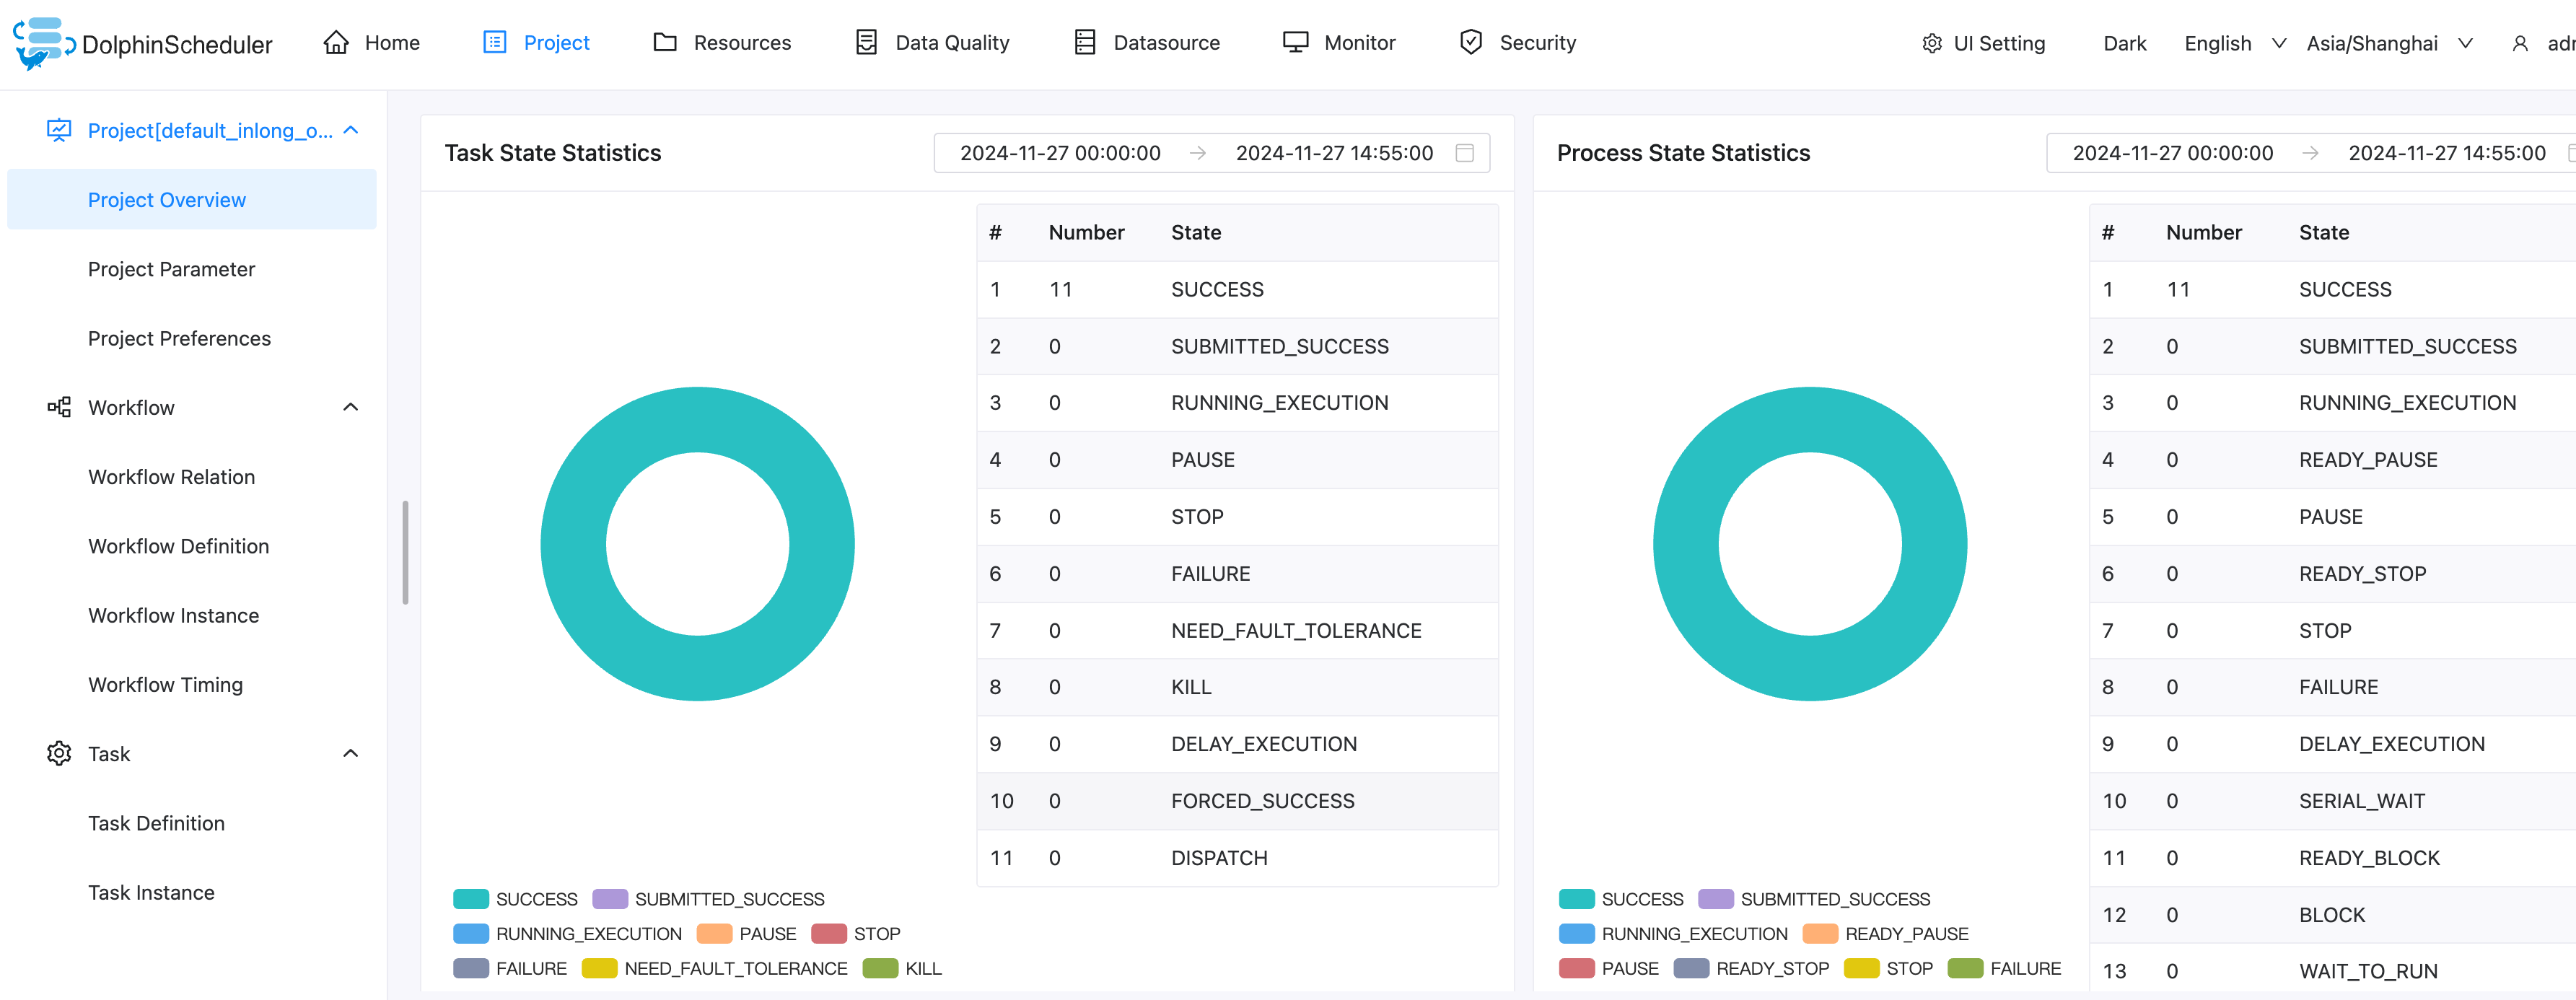
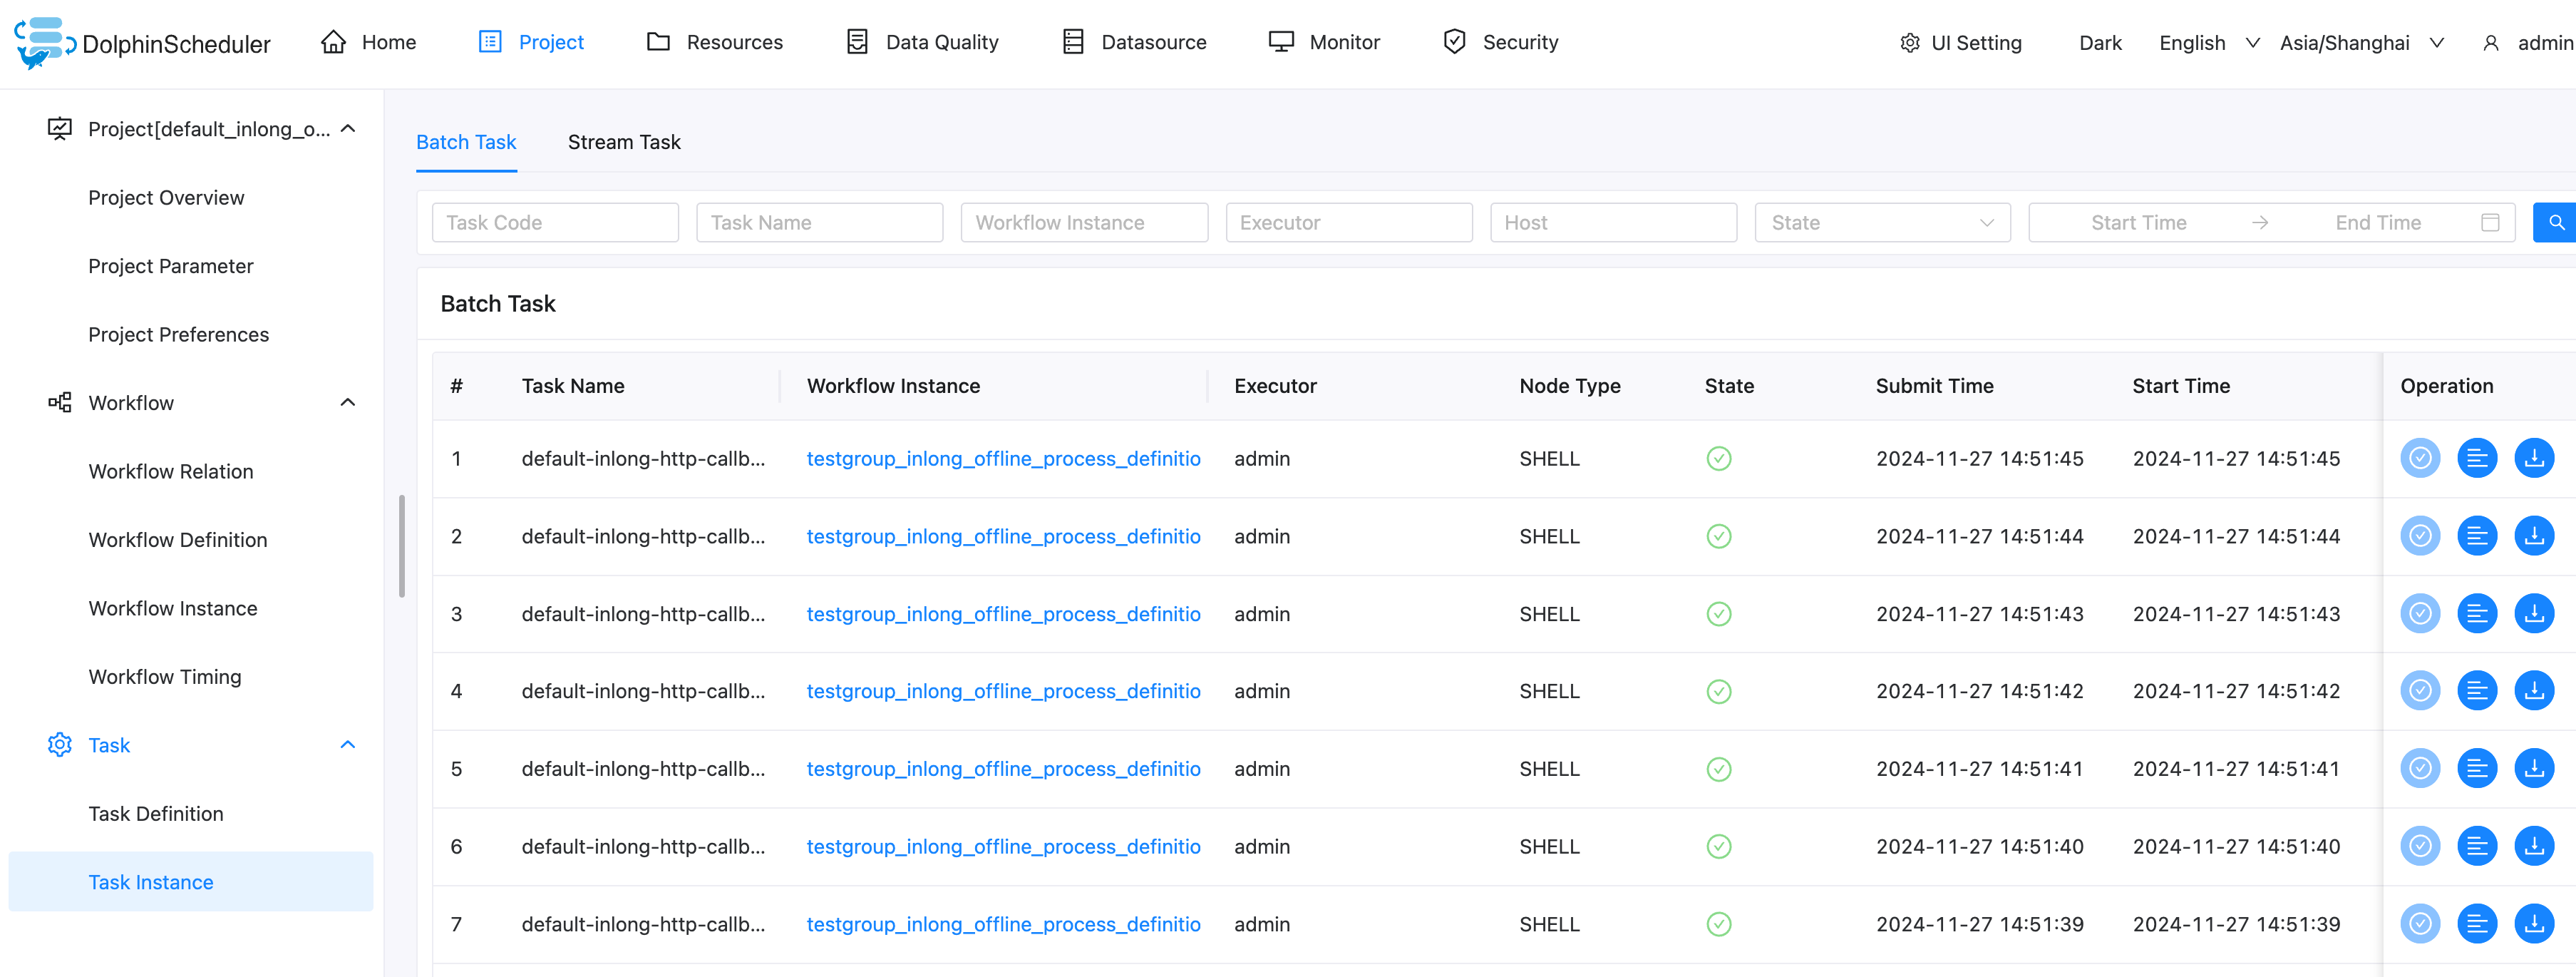
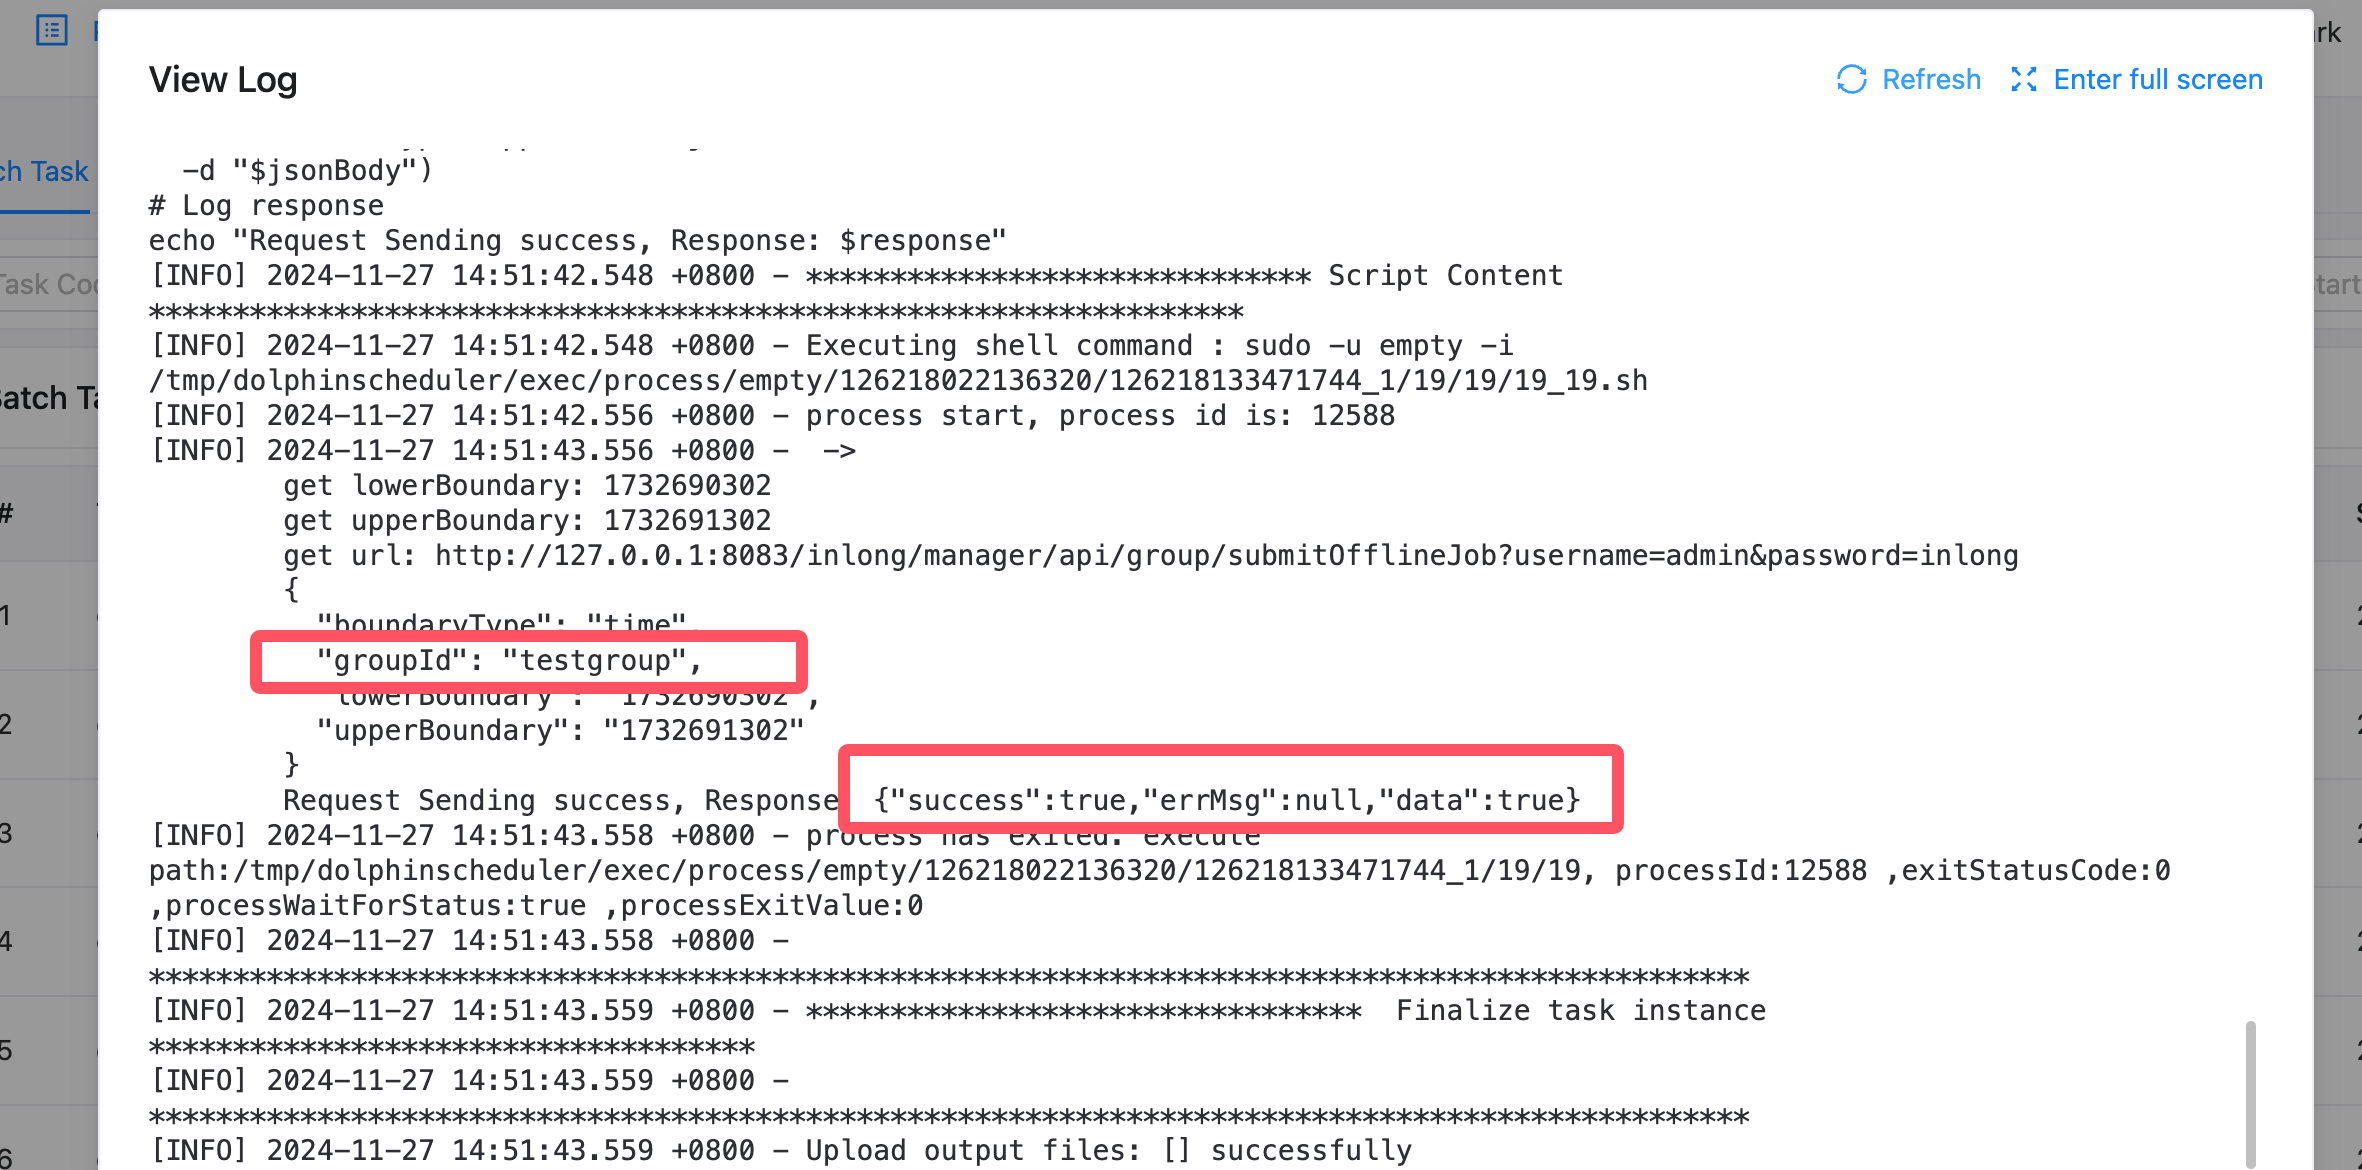
View the DolphinScheduler task instance logs. The following logs indicate that the configuration is successful.
Test Data
Sending Data
Use the Pulsar SDK to produce data into the Pulsar topic. An example is as follows:
// Create Pulsar client and producer
PulsarClient pulsarClient = PulsarClient.builder().serviceUrl("pulsar://localhost:6650").build();
Producer<byte[]> producer = pulsarClient.newProducer().topic("public/default/test").create();

// Send messages
for (int i = 0; i < 10000; i++) {
    // Field separator is |
    String msgStr = i + "|msg-" + i;
    MessageId msgId = producer.send(msgStr.getBytes(StandardCharsets.UTF_8));
    System.out.println("Send msg : " + msgStr + " with msgId: " + msgId);
}
Data Validation
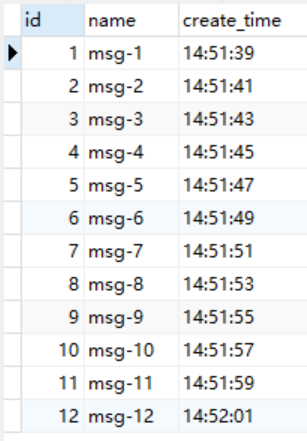
Then enter MySQL to check the data in the table: