Quartz Scheduling Engine Example
In the following sections, we will walk through a complete example to demonstrate how to use Apache InLong's built-in scheduling engine (Quartz) to create an offline data synchronization from Pulsar to MySQL.
Deployment
Install InLong
Before we begin, we need to install InLong. Here we provide two ways:
- Docker Deployment (Recommended)
- Bare Metal Deployment
Add Connectors
Download the connectors corresponding to Flink version, and after decompression, place sort-connector-jdbc-[version]-SNAPSHOT.jar in /inlong-sort/connectors/ directory.
Currently, Apache InLong's offline data synchronization capability only supports Flink-1.18, so please download the 1.18 version of connectors.
Cluster Initialize
When all containers are successfully started, you can access the InLong dashboard address http://localhost, and use the following default account to log in.
User: admin
Password: inlong
Create Cluster Tag
Click [Clusters] -> [ClusterTags] -> [Create] on the page to specify the cluster label name and person in charge.
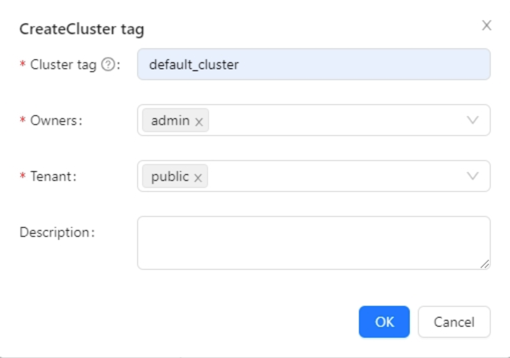
default_cluster is the default ClusterTags for each component. If you decide to use a different name, make sure to update the corresponding tag configuration accordingly.
Register Pulsar Cluster
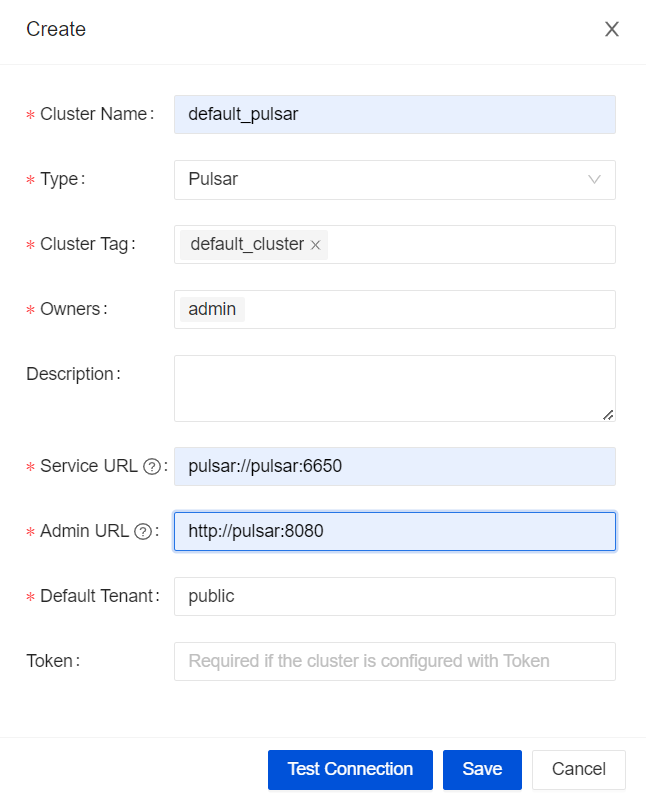
You can refer to the screenshot information to fill in details such as cluster name, associated tag, and Pulsar cluster address.
Task Creation
Create Data Stream Group
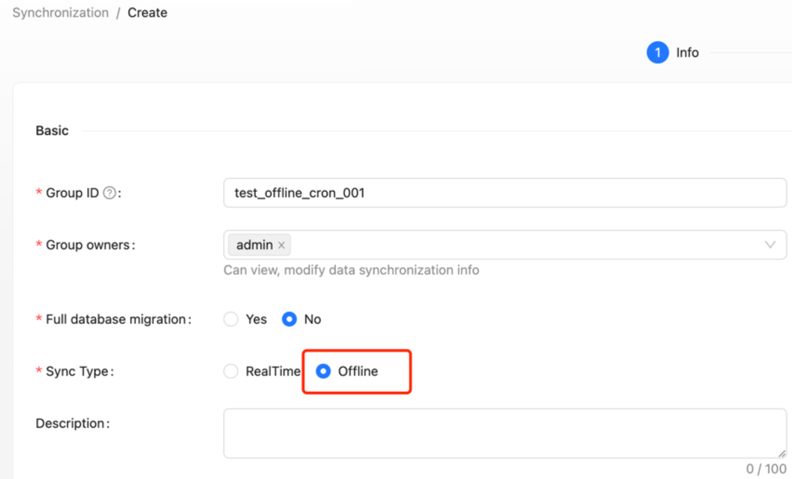
Click on [Synchronization]→[Create], fill in the Group ID, and ensure the [Sync Type] is checked as "Offline".
Configuration Scheduling Rules
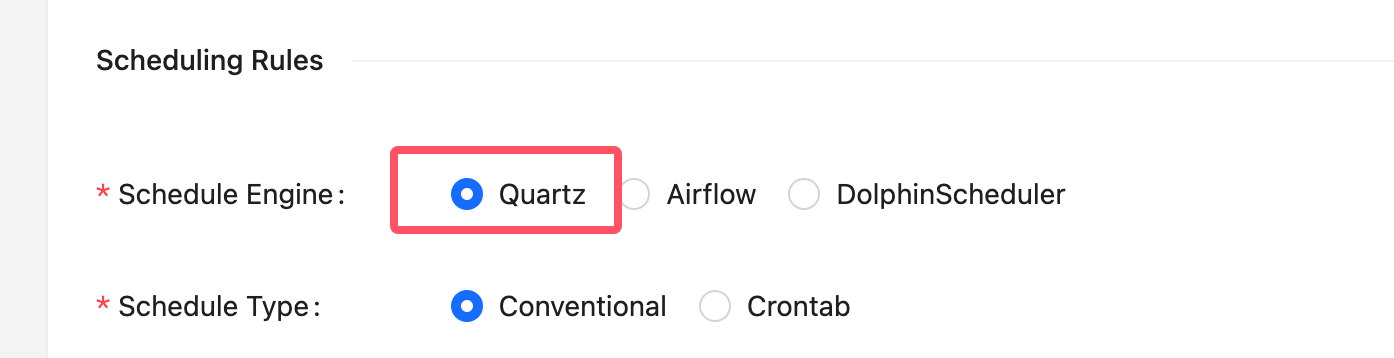
After selecting "offline" for [Sync Type], you can configure the [Scheduling Rules] for offline tasks. Scheduling Rules include two parts: [Scheduling Engine] and [Scheduling Type].
Scheduling Engine
Apache InLong provide several scheduling engines for users to choose from, Quartz is a build-in schedule engine in Apache InLong. Here we use quartz to handle tasks.
Schedule Type
Apache InLong supports two scheduling types currently: Conventional and Crontab.
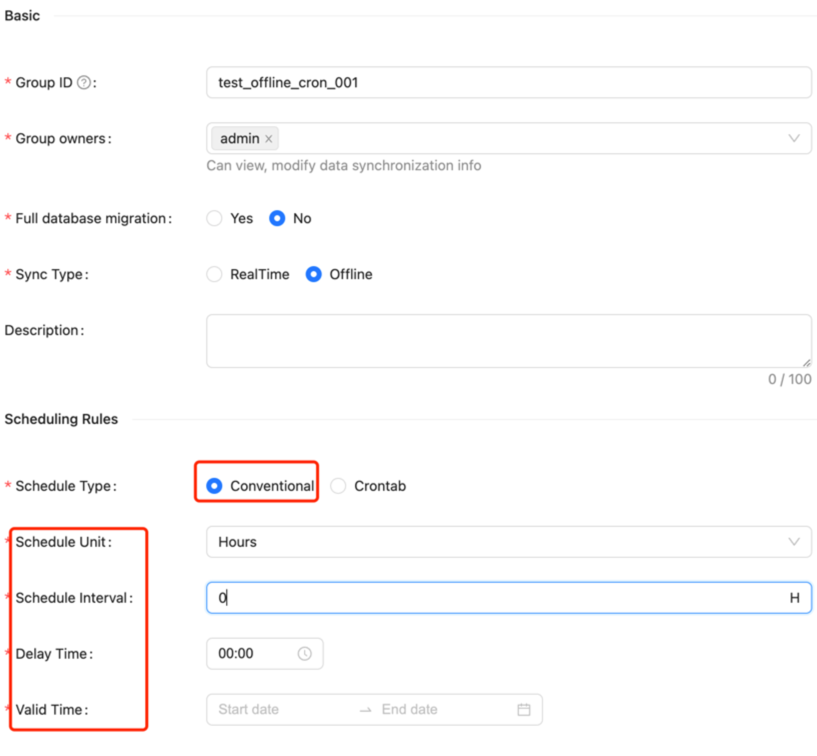
Conventional Scheduling Configuration requires the following parameters:
- Scheduling Unit: Supports minutes, hours, days, months, years, and single execution (single execution means it will run only once).
- Scheduling Interval: Indicates the time interval between two task schedules.
- Delay Time: Indicates the delay time for task startup.
- Valid Time: Includes start time and end time; the scheduled task will only execute within this time range.
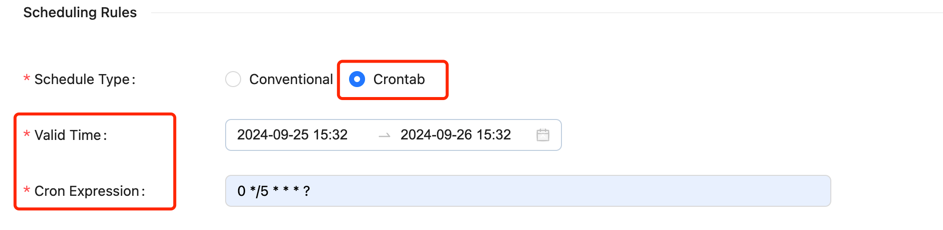
Crontab Scheduling requires the following parameters:
- Valid Time: Includes start time and end time; the scheduled task will only execute within this time range.
- Crontab Expression: Indicates the task cycle, e.g.
0 */5 * * * ?
Create Data Source
In the data source section, click [Create] → [Pulsar], and configure the data source name, Pulsar tenant, namespace, topic, admin URL, service URL, data format, and other parameters.
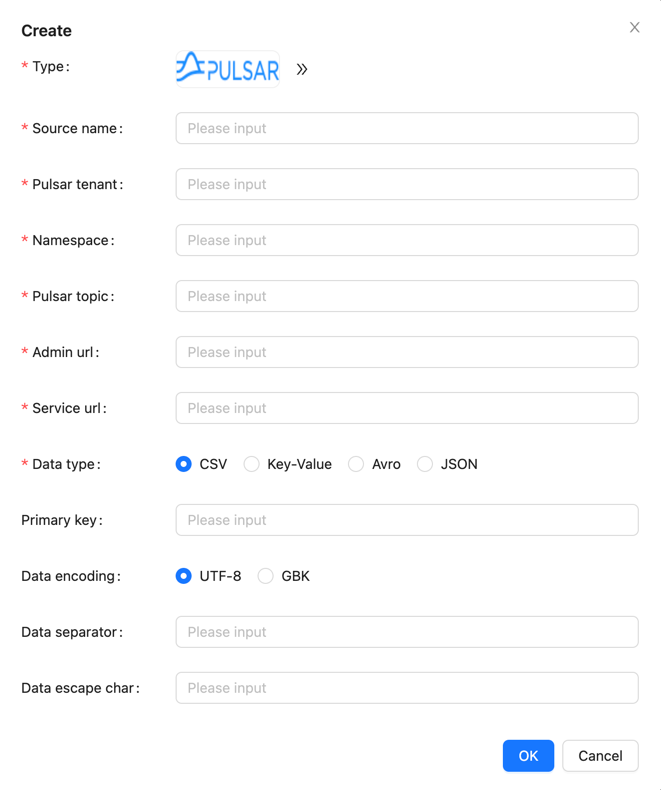
Note: The Pulsar topic needs to be created in the Pulsar cluster in advance (or enable the automatic topic creation feature in the Pulsar cluster).
Create Data Sink
Create the target MySQL table; the example SQL is as follows:
CREATE TABLE sink_table (
    id INT AUTO_INCREMENT PRIMARY KEY,
    name VARCHAR(255) NOT NULL,
    create_time TIMESTAMP DEFAULT CURRENT_TIMESTAMP
);
In the data sink section, click [Create] → [MySQL], and configure the data sink name, database name, and table name (test.sink_table), among other information.
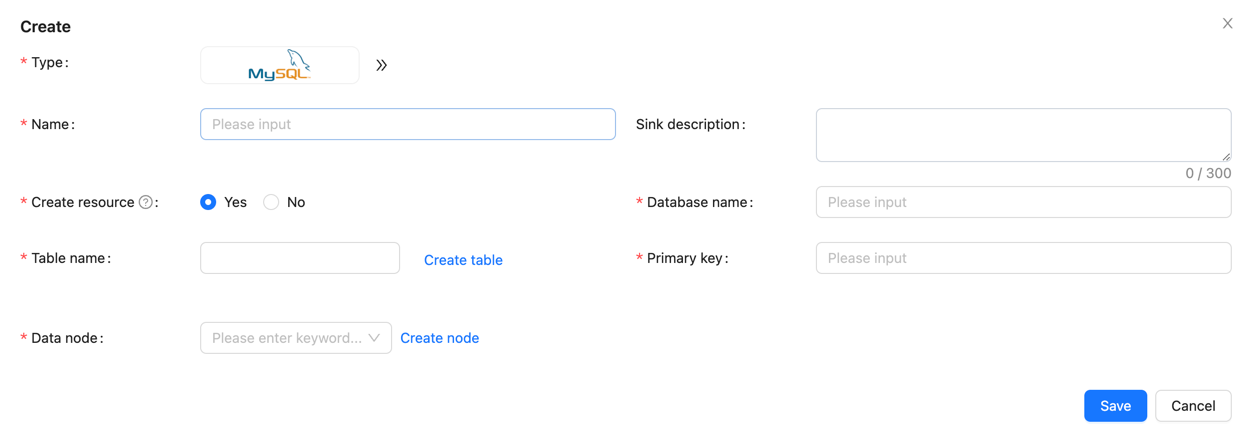
Configure source and sink fields
Configure schema mapping information in the [Source fields] and [Sink fields] sections, and click [Submit] for approval.
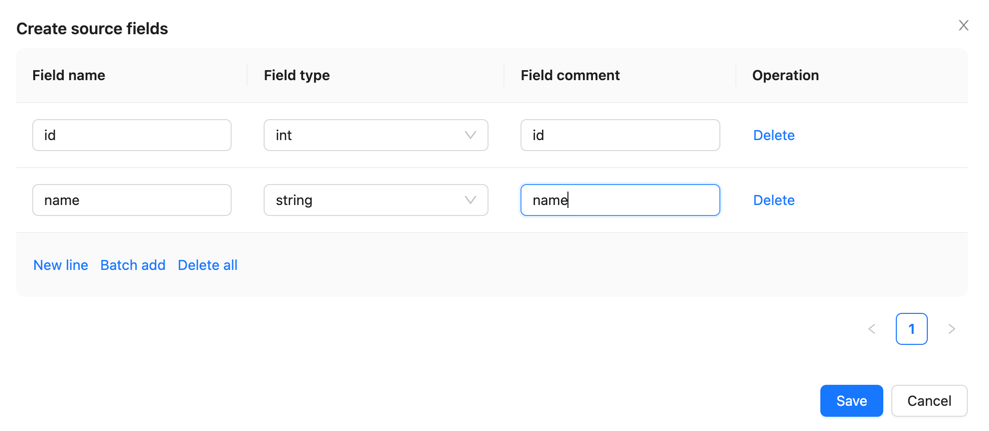
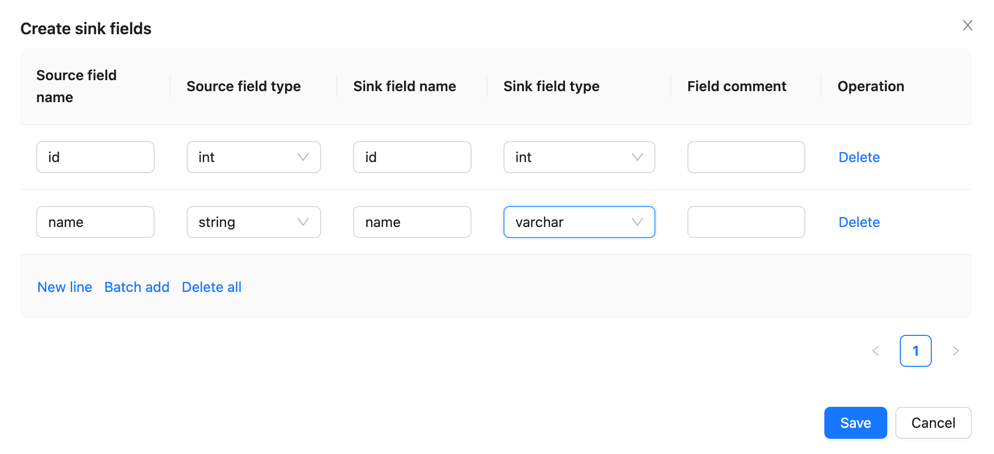
Approval data flow
On the page, click [Approval] -> [My Approvals] -> [Approve] → [OK].

Return to the [Synchronization] page and wait for the task configuration to succeed. Once configured successfully, the Manager will periodically submit Flink Batch Jobs to the Flink cluster.
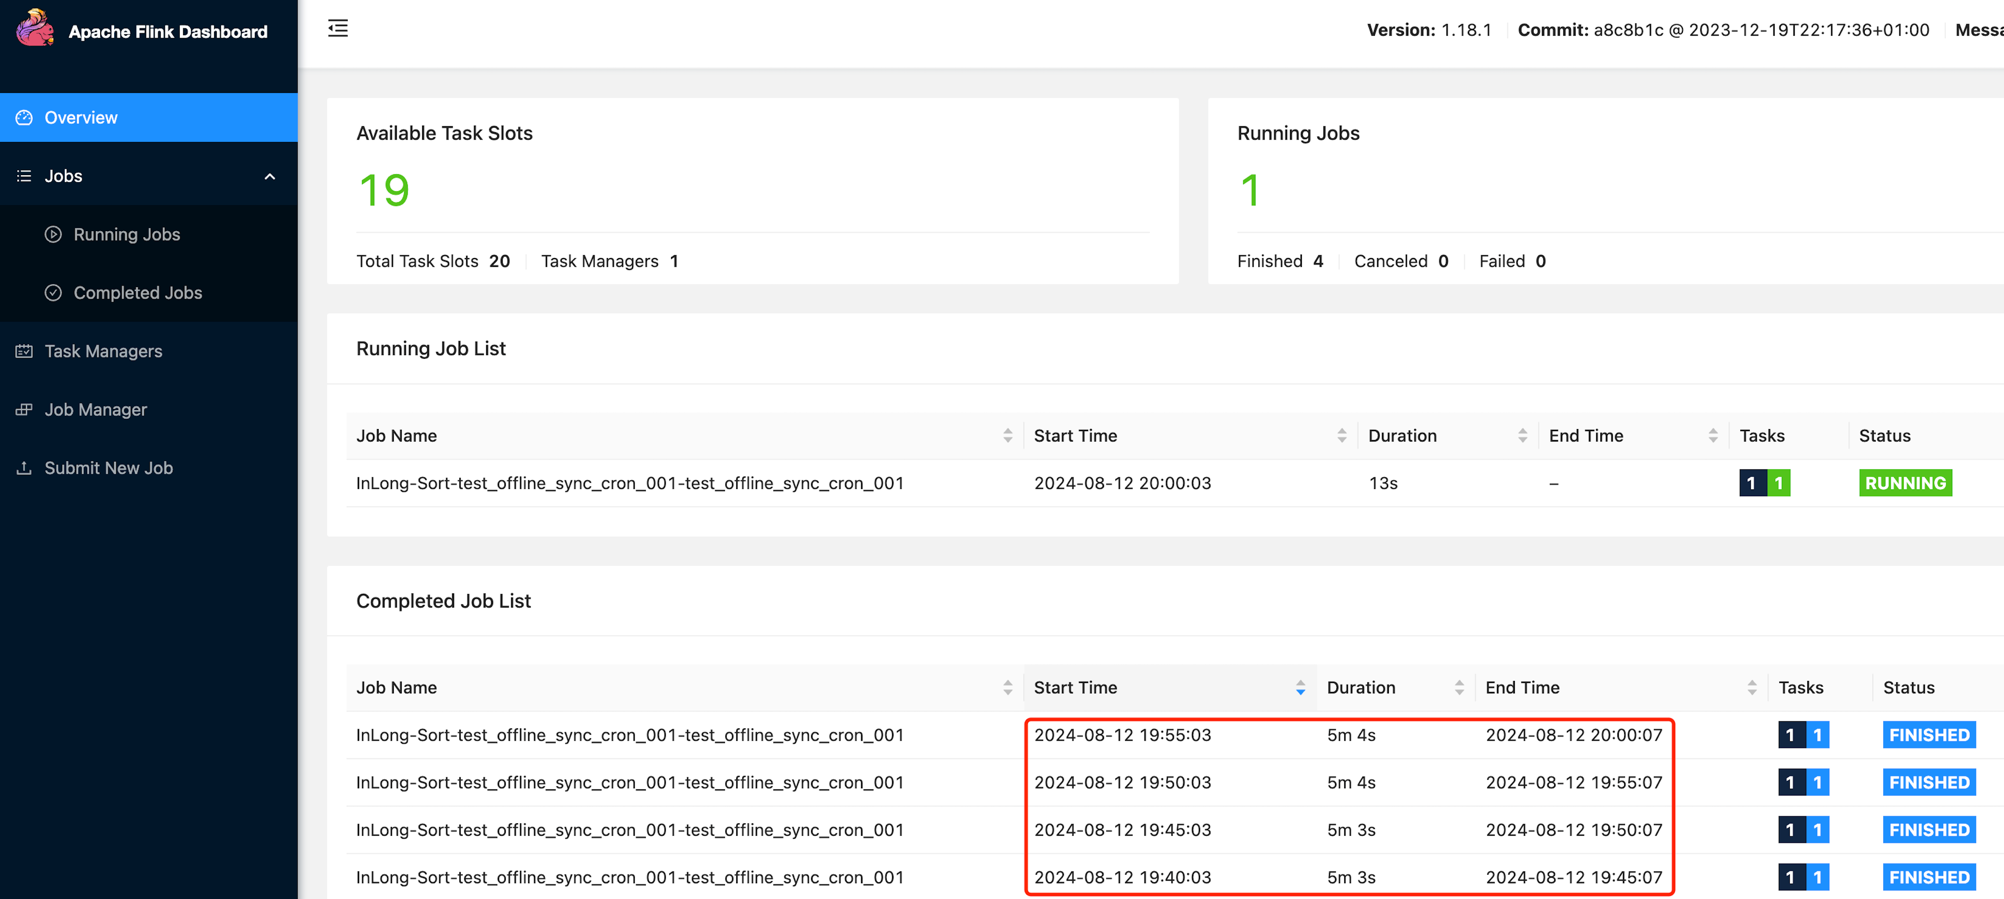
Test Data
Sending Data
Use the Pulsar SDK to produce data into the Pulsar topic. An example is as follows:
// Create Pulsar client and producer
PulsarClient pulsarClient = PulsarClient.builder().serviceUrl("pulsar://localhost:6650").build();
Producer<byte[]> producer = pulsarClient.newProducer().topic("public/default/test").create();

// Send messages
for (int i = 0; i < 10000; i++) {
    // Field separator is |
    String msgStr = i + "|msg-" + i;
    MessageId msgId = producer.send(msgStr.getBytes(StandardCharsets.UTF_8));
    System.out.println("Send msg : " + msgStr + " with msgId: " + msgId);
}
Data Validation
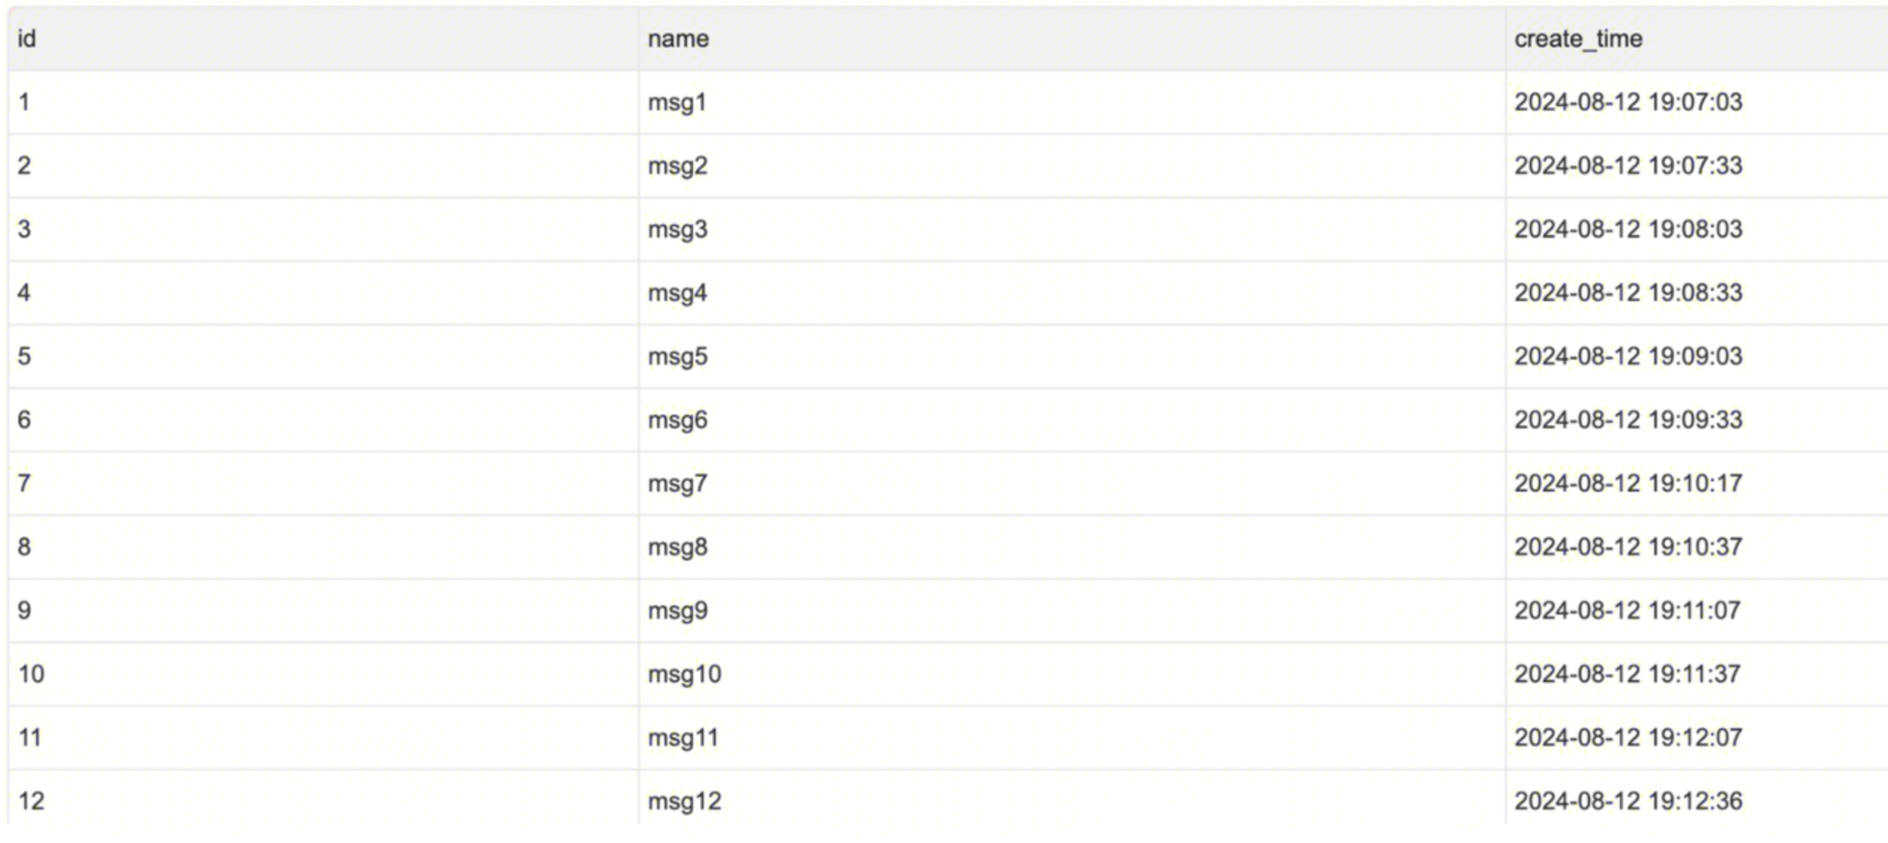
Then enter MySQL to check the data in the table: